


|
A step at a time:
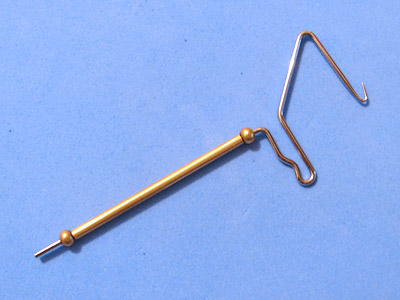
MATARELLI WHIP-FINISH
PDF print version
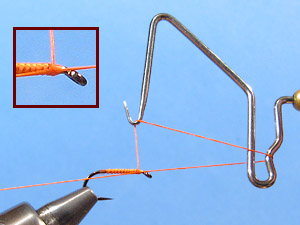
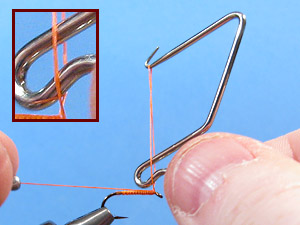
Step 1
|
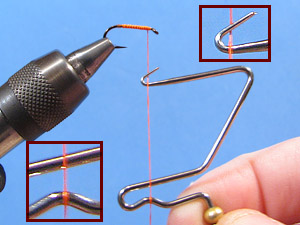
Come in with the tool from behind. Catch the
thread with the top hook and the dent in the lower bend. |
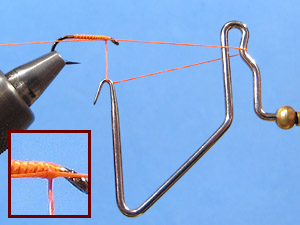
Step 2
|
Bring the bobbin up behind the tool. |
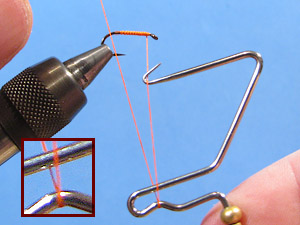
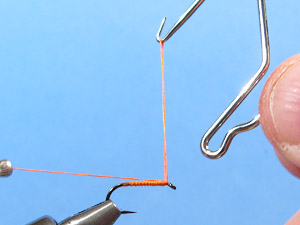
Step 3
|
Rotate the tool 180 degrees clockwise and move it
up to a horizontal position, forming the "whip-finish triangle". |
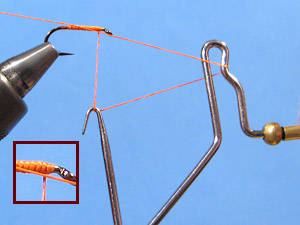
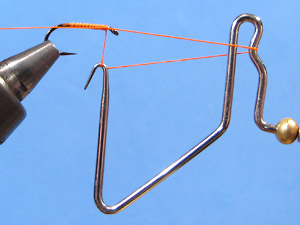
Step 4
|
Then start wrapping with the tool. It will follow
your wraps and you don't have to concentrate on rotating it. |
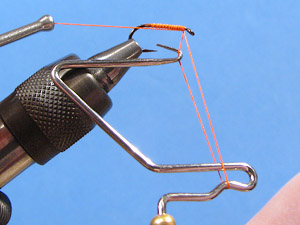
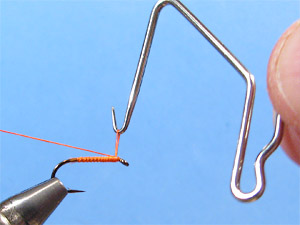
Step 5
|
One wrap done. Was that simple or what?? |
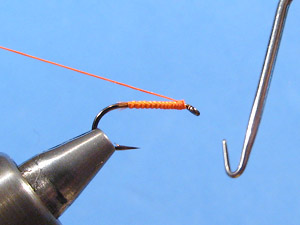
Step 6

|
Can't be much simpler than that... |
Step 7
Step 8
|
After a few wraps, bring the tool down to a
position perpendicular to the hook. |
Step 9
|
Push it upwards, so the top hook and the lower
bend switch places in the loop. |
Step 10
|
Let the lower bend slide out and leave the loop. |
Step 11
|
Pull the bobbin and start tightening the loop. |
Step 12
|