


|
A step at a time:
FINGER WHIP-FINISH
PDF print version

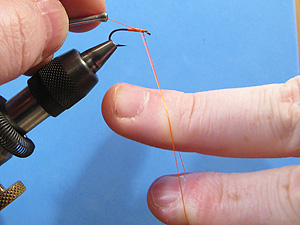
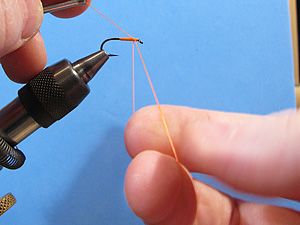
Step 1

|
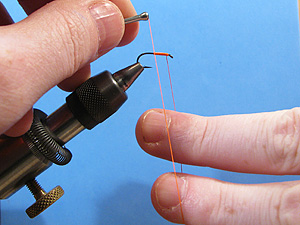
Place your index finger and your middle finger
against the thread. |
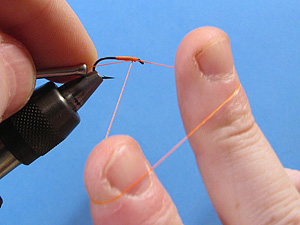
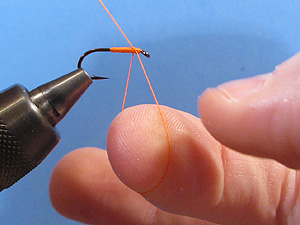
Step 2
|
Lift the bobbin and form a thread loop around
your fingers. |
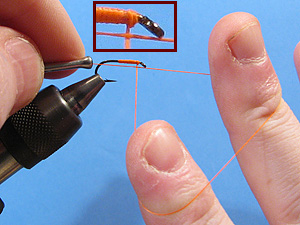
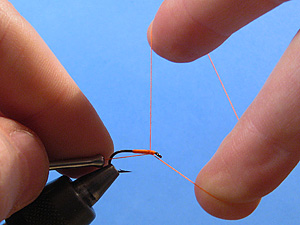
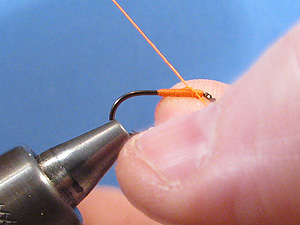
Step 3
|
With your middle finger, catch the thread coming
from the bobbin and bring it to the right, outside the hook eye. Together with your bobbin hand,
position it parallel to the hook shank. |
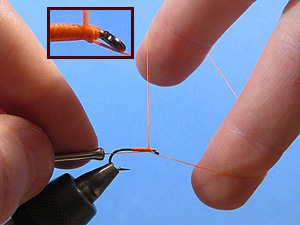
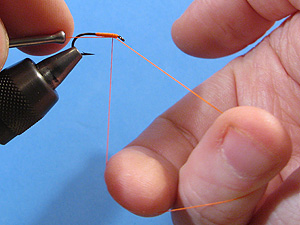
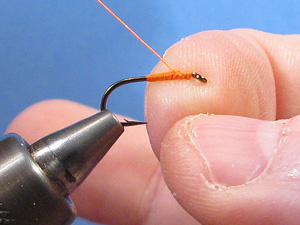
Step 4
|
Here's your whip-finish tool, with your index
finger in the role of the whip-finish tool's top hook, your middle finger in the role of the bottom
hook... and your wrist in the role of the handle.
Now, while rotating your hand 180 degrees clockwise,
bring the thread coming from the hook up with your index finger and trap the thread coming from the
bobbin against the hook shank. |
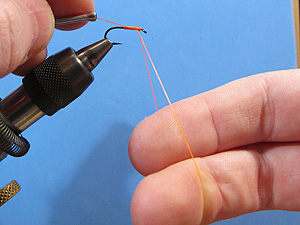
Step 5

|
Complete the wrap with your index finger by
bringing the thread down on the back side. |
Step 6
|
At this point this type of "handle" has reached its
limitations and cannot be rotated further. In order to continue wrapping, the hand must return to its
initial position. So start with bringing both sides of the loop back down under the hook. |
Step 7
|
Rotate your hand 180 degrees counterclockwise,
allowing your fingers to switch places in the loop. When this is done you'll be back at where you
were in Step 2, able to "continue by starting over"... so to speak. |
Step 8
|
With your middle finger, catch the thread coming
from the bobbin and bring it back out to the right, forming the same kind of thread triangle as in
Step 3. |
Step 9
|
Then start a new wrap with the thread coming from
your index finger... |
Step 10
Step 11
|
Let's say you have done another 1-2 wraps and it's
time to finish the knot: Pull the bobbin and the loop around your fingers will start to tighten up. |
Step 12
|
When it's getting crowded in the loop, pull the
middle finger out of the game and continue tightening up. |
Step 13
|
Let the thread leave the last finger by sliding
down the tip of it, where you will have the thumb ready to trap it. This little loop often gets a
life of its own when set free, so you want to keep it under control and as an open loop tightening
up between your fingers.
You can also use the closed scissor blades instead of your finger to
be able to follow the loop all the way until it closes. It will not spoil the "one less moment"
idea, since you're still going to use it after tightening the knot.
(Maybe you've had it in your hand the whole time.) |
Done...
|
There!! Loop is gone... whip-finish done. |
|