


|
A step at a time:
MONTANA, SLIM
& SPARKLY
PDF print version
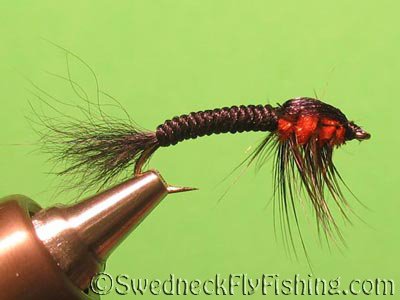
| Hook: |
Dai-Riki
270, #8-12 |
|
Thread: |
Gudebrod
8/0, black |
|
Tail: |
Fox tail,
black |
|
Body: |
Antron
yarn - roped, black |
|
Wingcase: |
2
strands of Antron yarn, black |
|
Thorax: |
Ice Dub,
hot orange |
|
Hackle: |
Hen,
black |
(Full-size pictures on click.)
Step 1
|
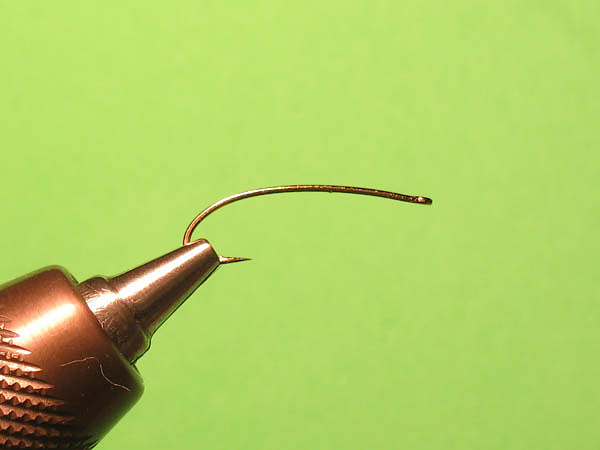
Mount a hook in the vise. This is a Dai-Riki 270 Natural
Bend hook, a hook type that's often used for stonefly
nymphs. A regular streamer hook can also be used. |
Step 2

|
Tie in the thread and cover the shank to the hook bend.
On a hook like this (without an actual "start" of the bend),
use the barb as a guide. |
Step 3

|
Cut a bunch of hair from fox tail and clean out the
longer guard hairs. Put them aside... or in the waste bag.
They are of no interest now. What we're interested in are
the softer hairs. Tie in a tail, but don't trim the waste
just yet.
TIP: These fox tail hairs are also a very good substitute
for Marabou on bugger flies. They are soft enough to make
the the fly alive in the water but they still don't tangle
up in the hook bend. (They are also much more durable.) |
Step 4

|
Tie down the surplus to about 2/3 of the
fly's total body length. |
Step 5
|
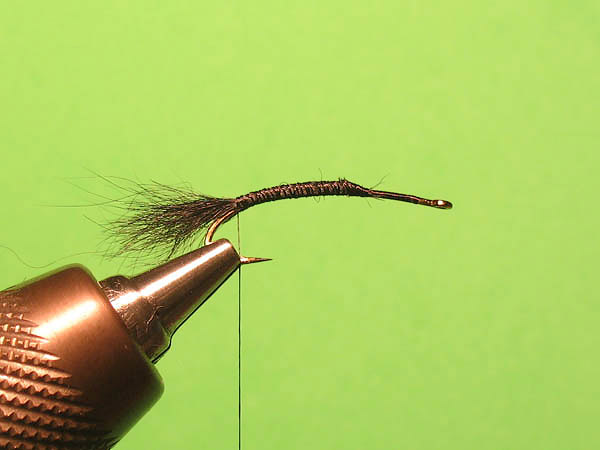
Cut the waste end and return with the thread to the back
of the hook. Tight and touching wraps now, to create an even
and compact underbody. |
Step 6
|
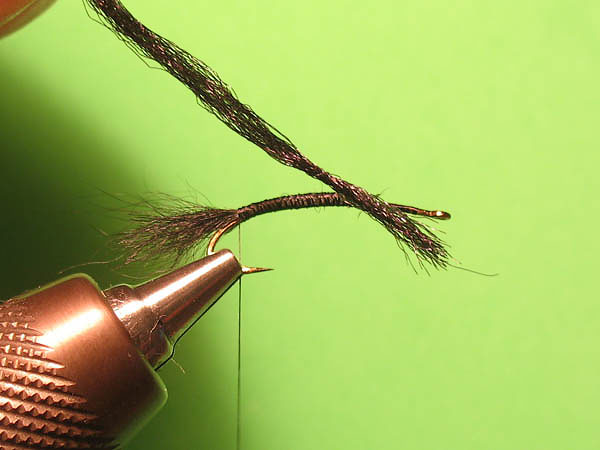
First synthetic material... antron yarn. Looks a little
bit like poly yarn, but the difference is that the filaments
are triangular. This causes it to reflect light much better.
We like sparkly... |
Step 7
|
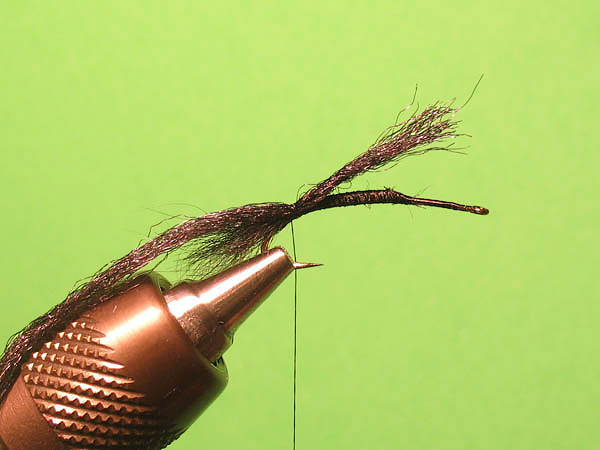
Tie in the antron yarn and see to it that the waste end
is long enough to cover at least 2/3 of the fly's total body
length. |
Step 8
|
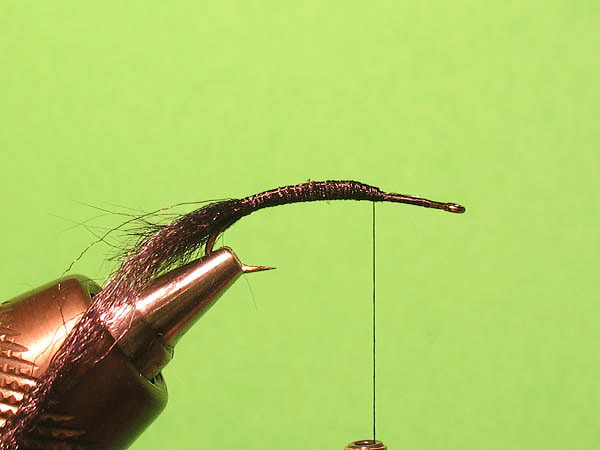
Tie down the waste end to 2/3 of the body
length with tight and touching wraps, again to ensure a
compact and even underbody. Cut the waste and let the bobbin
rest for a while. |
Step 9
|
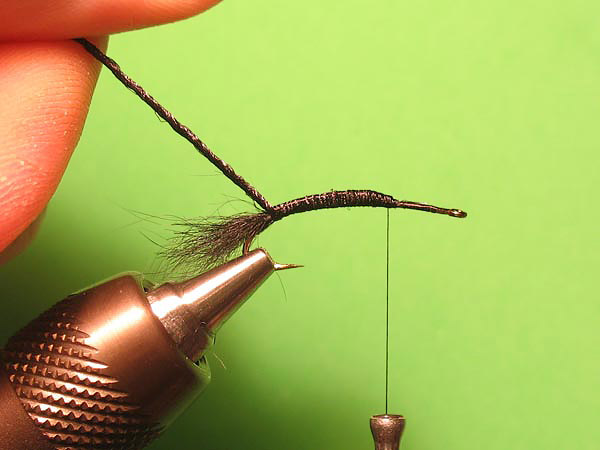
Stretch the antron yarn and twist it quite hard. It's
supposed to be like a round rope and compact enough to keep
that shape while it's wrapped onto the hook. |
Step 10

|
Wrap the antron rope forward to the thorax starting point.
Make a loose thread wrap around it and then tighten the
thread at the same time as you let the antron rope "relax"
and collapse under the thread. This will give a neater
tie-off. Secure with another few wraps and cut the waste. |
Step 11

|
Cut another two pieces of
Antron yarn for the wingcase. Flatten them out and untangle
the filaments with the bodkin. |
Step 12

|
Tie in the antron pieces
together and try to keep the antron filaments evenly spread
out on the top of the hook. Form a little cone with the
thread that is pressing the filaments firmly against the
hard abdomen and keeps them in a spread-out formation. |
Step 13

|
Tie in a hackle feather with
the dull side up. Rooster or hen is optional. I prefer hen
though, since it adds a little "life" to the fly. |
Step 14

|
For the thorax, we take a
step further from tradition and use dubbing instead of yarn.
There are many variants of synthetic dubbing and as long as
they are sparkly (and preferably quite coarse), they will
suit this fly. My own favourites are Ice Dub and Crystal
Seal. |
Step 15
|
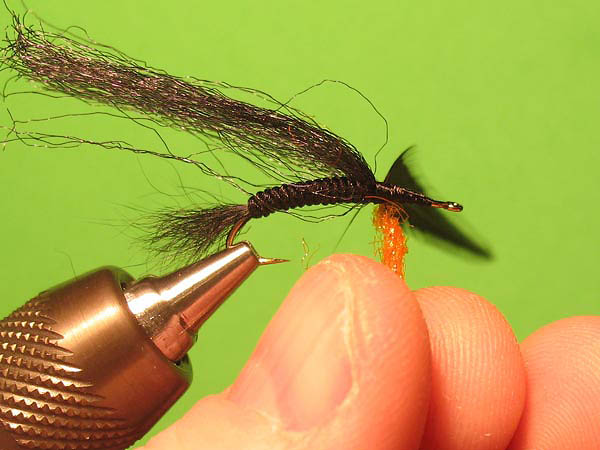
Be firm when dubbing the
thread. The thorax is supposed to be quite fat and at the
same time compact. Don't take too much dubbing at a time.
Coarse synthetic dubbing isn't as co-operative as natural
dubbing. It's better to dub in steps and wrap multiple
layers. |
Step 16
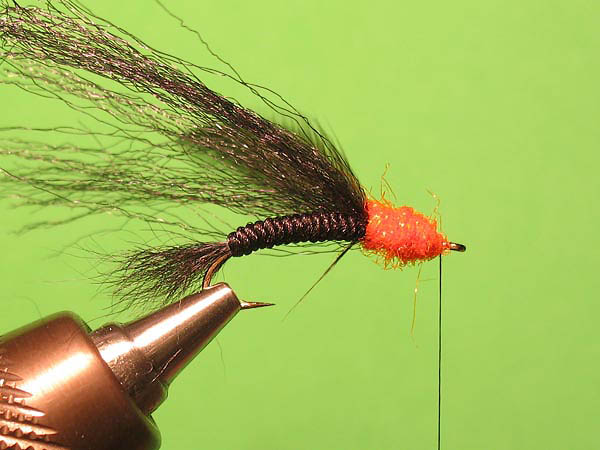
|
A finished and compact
thorax. Moderate amounts of dubbing on the thread and
instead built with three layers. |
Step 17
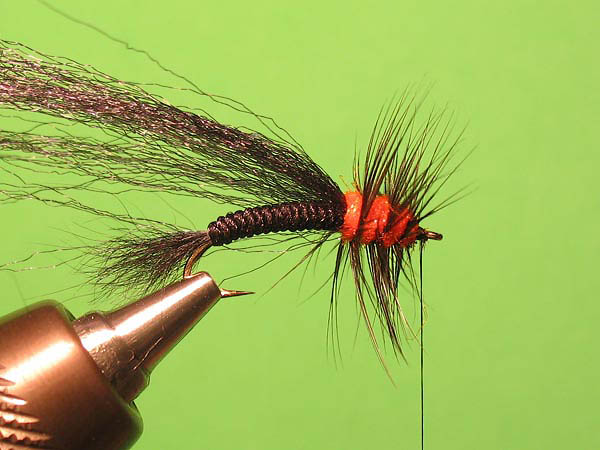
|
Take a few wraps with the
hackle, tie it down and cut the waste. This is a point where
you can see if the dubbing operation was successful. If it
was, the thorax should have kept its shape and the wrapped
hackle shouldn't have turned it into a shapeless mess. |
Step 18
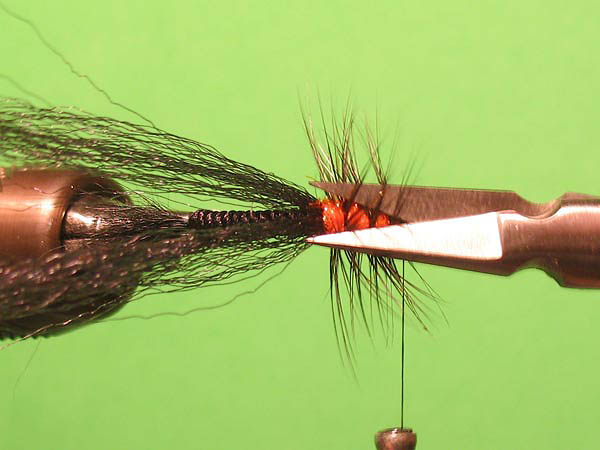
|
Cut the top hackle barbs as
close to the stem as possible. |
Step 19
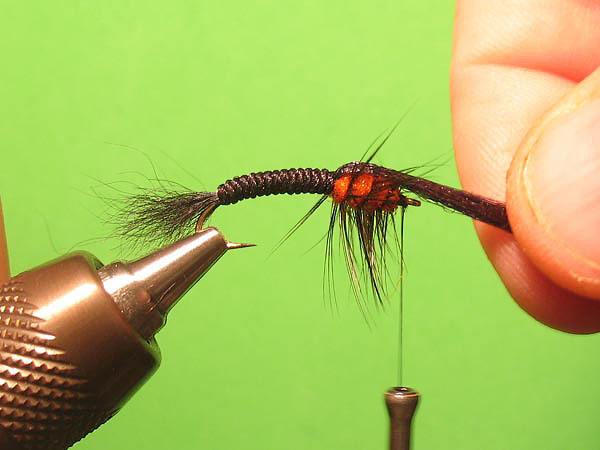
|
Take the antron pieces and
slide them between the fingers a couple of times to stretch
out any loose filaments. Then fold them over the thorax. |
Step 20
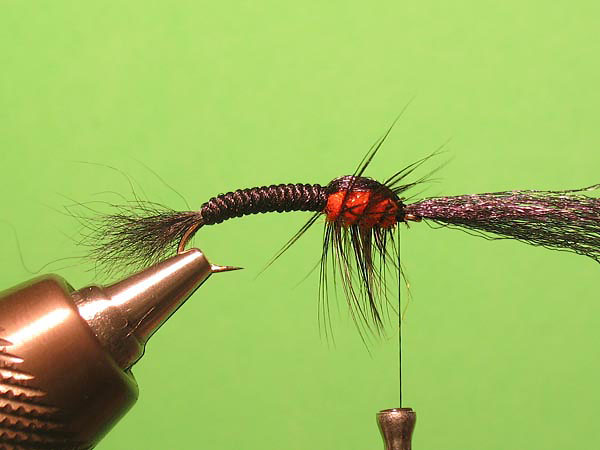
|
Lay the thread over the
antron while stretched forward and tighten slowly while you
move the antron back and forth to get it as spread out and
even as possible. Secure them with a couple of firm wraps
close to the thorax, but don't cut the waste end yet. |
Step 21
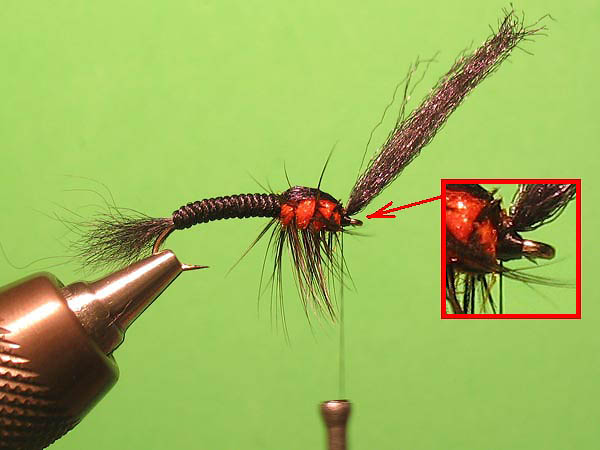
|
The filaments are hard and
slippery and we want to do more to secure them better.
Stretch the yarn upwards and build a little thread bump
immediately in front of it to hold it that way. |
Step 22
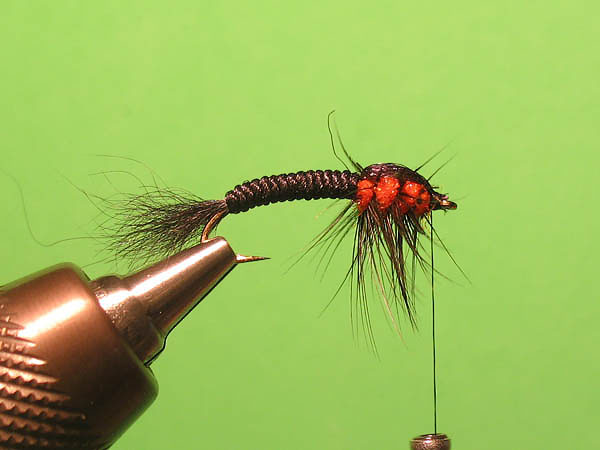
|
Cut the antron as close to
the thread as possible and even the head out with a few
wraps of thread. |
Step 23
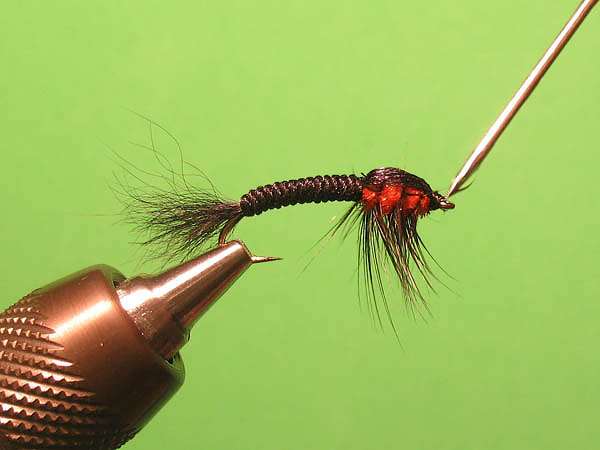
|
Whip-finish and cut the
thread. Apply some cement to the head and let the drop
include a little bit of the antron where it disappears under
the thread. Only the antron filaments in direct contact with
the thread are more or less secure here. Most are still only
squeezed between other (slippery) ones. The trout's teeth
will tare in the wingcase and these looser ones will slip
out. Every filament slipping out will weaken the grip of the
entire bunch... and soon the wingcase will be standing
straight up from the fly. This is not a guess. |
Done...
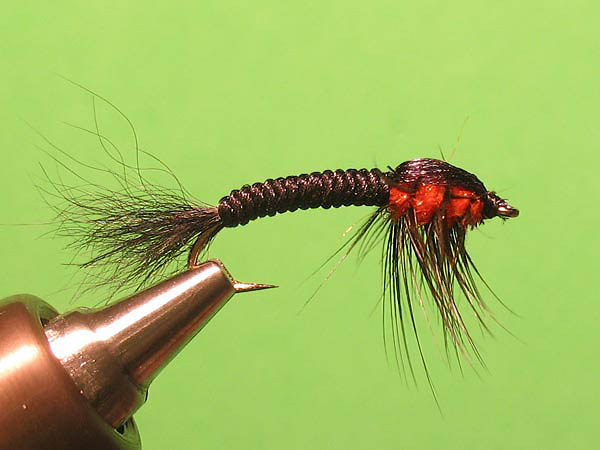
|
Vary colors, just as with the
original Montana pattern. A few variants I like are yellow,
red, green etc. for thorax and olive and brown for
abdomen/tail/hackle. |
|