


|
A step at a time:
COPPER JOHN
PDF print version
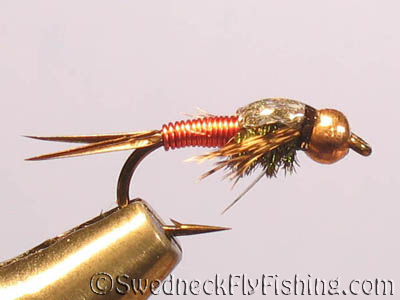
Originator: John Barr
| Hook: |
Mustad R70, #12 |
|
Thread: |
Gudebrod 8/0, black |
|
Weight: |
Gold bead, 3mm |
| Tail: |
Goose biots, black |
|
Abdomen: |
Ultra Wire, red |
|
Thorax; |
Peacock herl |
|
Wingcase: |
Fly Film, mottled
black with a strand of pearl holographic tinsel as a flashback.
|
|
Legs: |
Partridge |
|
"Finishing touch": |
A generous layer of
epoxy over the wingcase |
(Full-size pictures on click.)
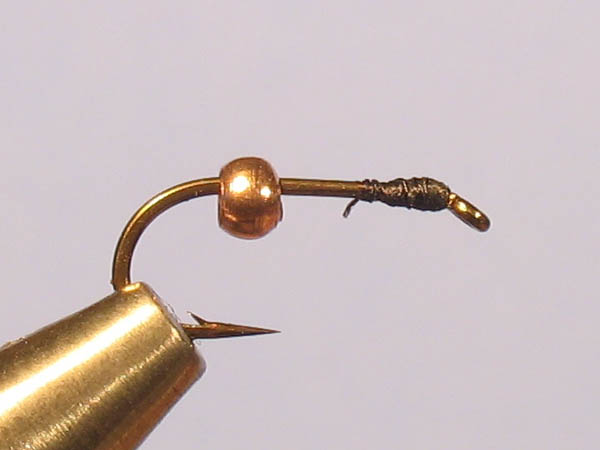
Step 1
|
Slide a bead onto the
hook, with the bigger hole facing the bend and mount the hook
in the vise. To center the bead on the hook I have built up
some bulk of floss behind the eye. It’s tapered backwards
for a reason. The floss will center its front end, but at
the back it will leave space for excess material to slip
into it. |
Step 2

|
Tie in the thread behind
the bead and wrap it down to the bend. |
Step 3

|
Tie in two biots, one on
each side. The convex side should face the hook so that they
curv from eachother. |
Step 4

|
Tie the butts down,
keeping them on the sides of the shank. Cut the excess at
the start of the thorax area. |
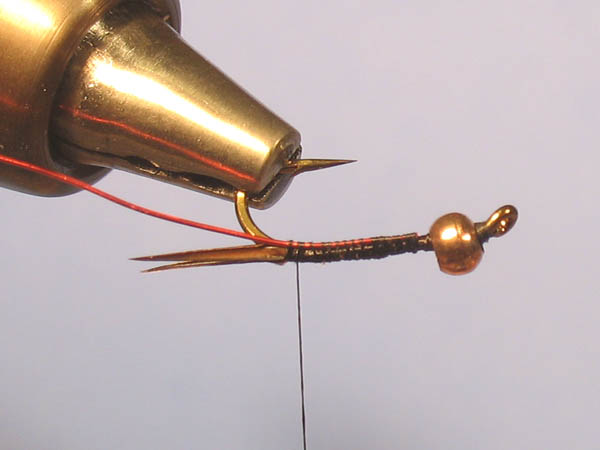
Step 5
|
Tie in the wire on the
side of the shank, about an eye length from the bead. (The
bead has slipped back on the picture.) Tie it down all the
way to the tail. |
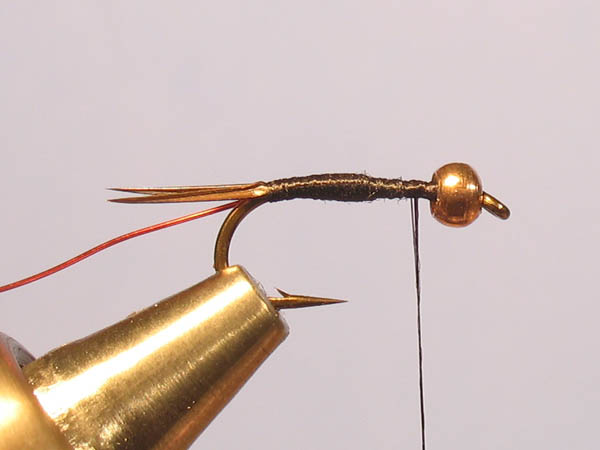
Step 6
|
Build a tapered base for
the abdomen. Make sure that you keep the thread flat so you
get a smooth surface. Every wrap will twist the thread and
eventually it will be round as a rope. Stop therefore a
little now and then and spin the bobbin counter clockwise
(seen from above) to untwist it again. |
Step 7
|
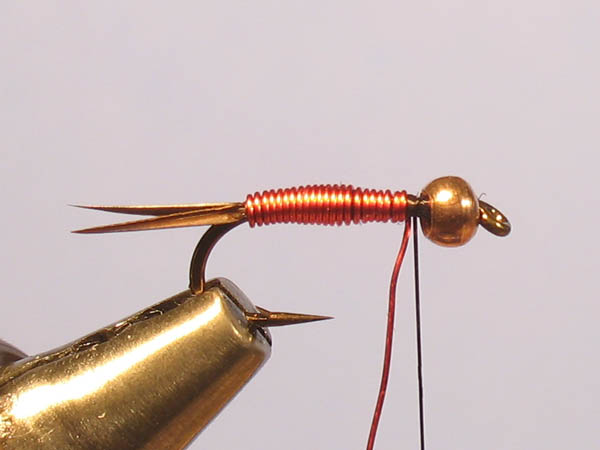
Wrap the wire in touching
turns and secure it with thread a couple of millimetres from
the bead. Wiggle it back and forth until it breaks. This way
there will be very little excess and you give your scissors
another couple of years. |
Step 8
|
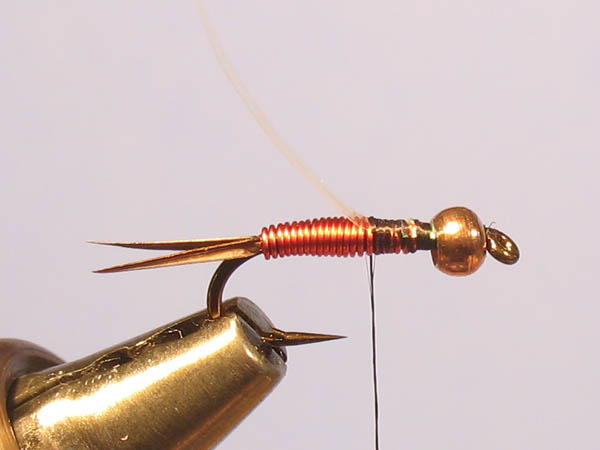
Tie in a
little piece of the holo-tinsel or two pieces of flashabou
(beside eachother) |
Step 9

|
Tie in a piece of Fly Film,
Thin Skin or something similar on top of the holo-tinsel. |
Step 10

|
Tie in 3-5
peacock herls in their tip ends. |
Step 11

|
Twist the herl a few turns
around the thread and wrap the package to the bead. Secure
it on the underside of the hook and cut the waste of the
herls (but not the thread). |
Step 12

|
Prepare a partridge feather
for legs. The fibres forming the “V” are here supposed to be
the legs of the fly. |
Step 13

|
Fold the feather over the
bead, so that the feather barbs are on the sides of the
tie-in point, but the stem is still in front of it. Only the
barbs are to be trapped with the thread. |
Step 14
|
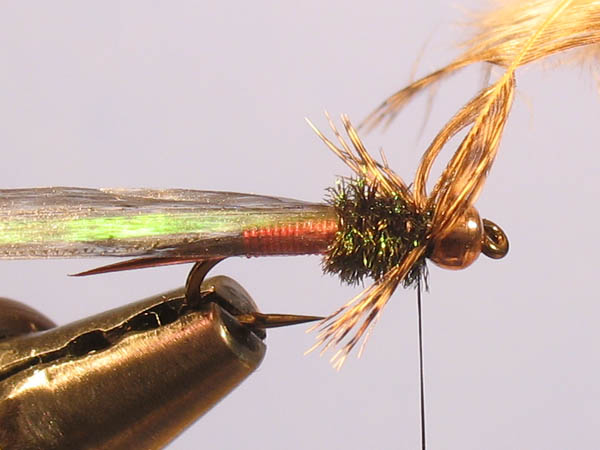
Tie in the barbs on each side
with a couple of wraps. If needed, adjust the length and
angle and secure with a few tighter wraps. |
Step 15
|
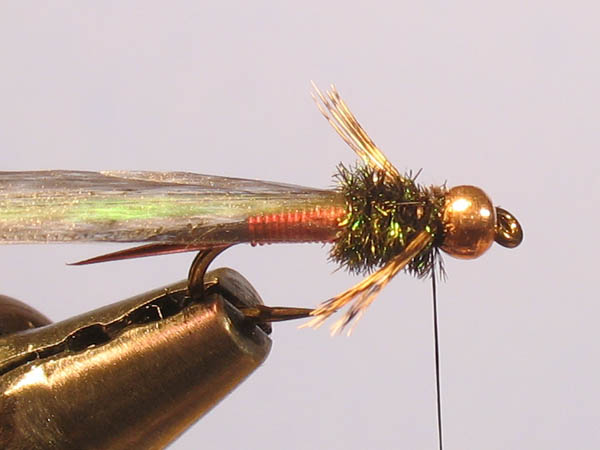
Cut the
waste from the feather. |
Step 16
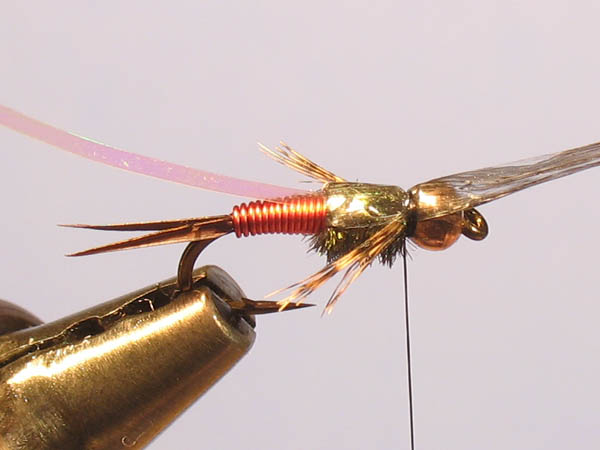
|
Fold the Fly Film (or
whatever) over the peacock herl, secure it behind the bead
and cut the excess. |
Step 17
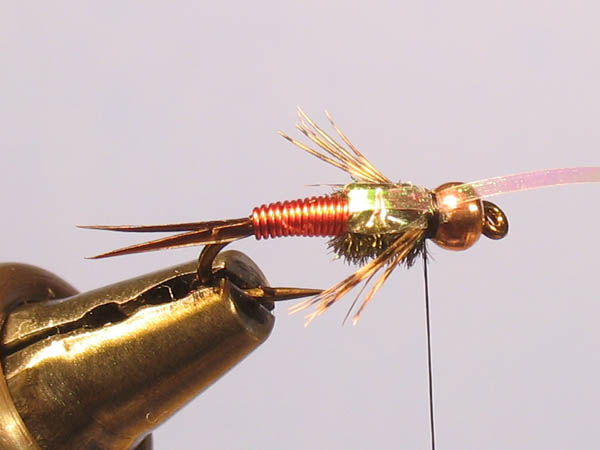
|
Fold the flashback over the
wingcase. Using Flashabou, be sure to get them close to or
slightly overlapping eachother. Also make sure it’s centered
before securing it behind the bead. Cut the waste end. |
Step 18
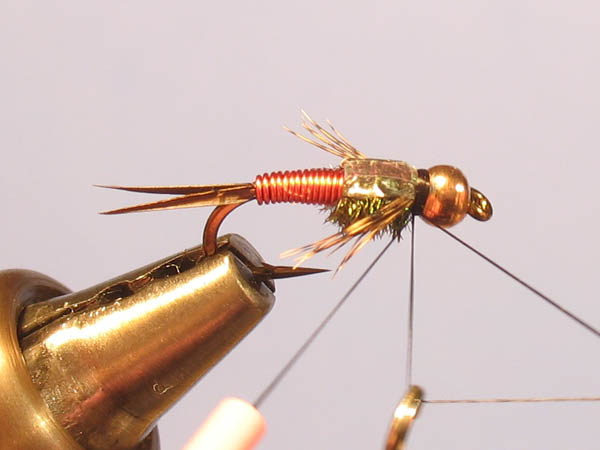
|
Build a
little ”neck” and whip-finish. |
Step 19
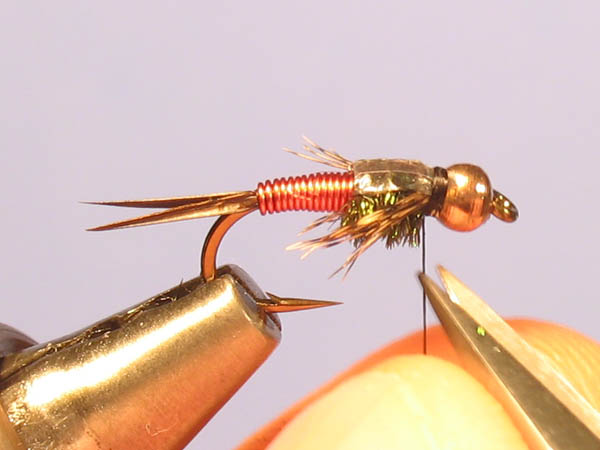
|
Tip for cutting thread close
to the fly without cutting everything else: Tighten the
thread and open the scissor blades just a little bit. With
the tips on each side of the thread you can now PUSH it off
instead of cutting in the regular manner. The thread can be
in a jungle of hackles and legs, but everything will move
away and the only thing breaking will be the thread. |
Step 20
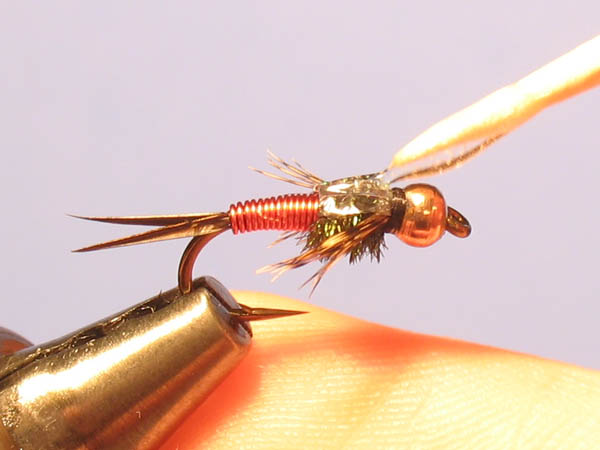
|
Mix some epoxy and cover the
entire wingcase, from side to side and from back of wingcase
to back of bead (including the thread.)
Epoxy tips:
1: Mix calmly to not whip down air bubbles in the mix.
2: Use a darker material to mix on. It makes it easier to
see if it’s clear or milky.
3: The mix should be 50/50 to give the best result. The
larger amount you mix, the easier it gets to get the parts
equal. So, to make good mixes without wasting too much glue,
do more than one fly at a time. |
Done...
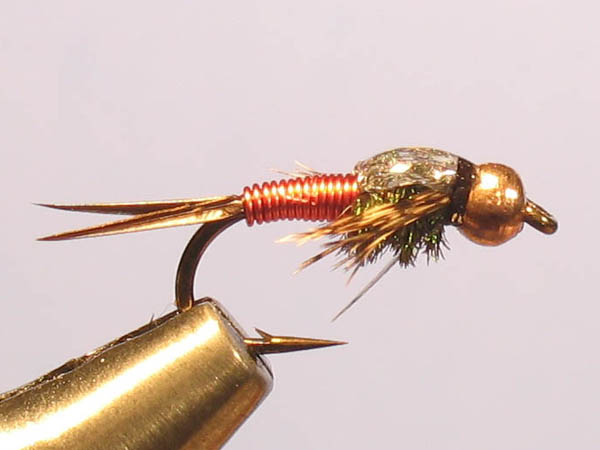
|
... and
picture below shows quite clearly why they call it
"flashback" |
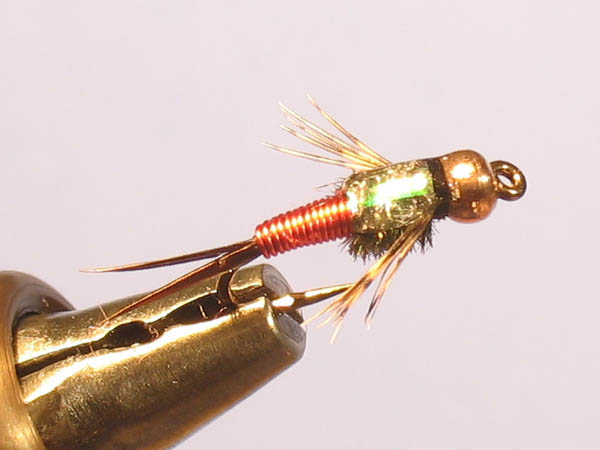
|