


|
A step at a time:
PARALLEL WEAVE
PDF print version
Here's a step-by-step
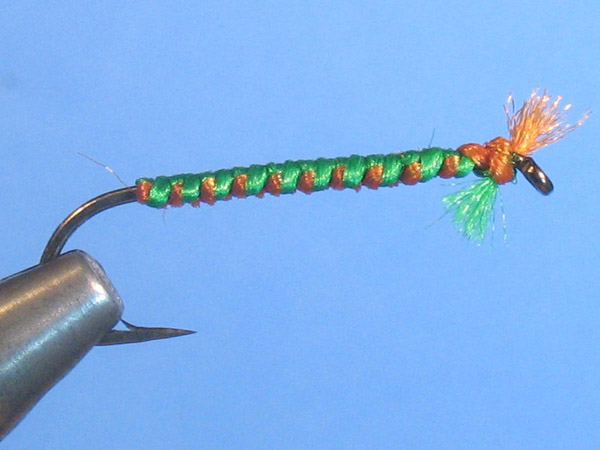
of a weave that can give quite an imitative fly. A nice segmentation, a flatter body and
the coloration like nature intended it - looking dark from above (against the bottom) and light from below (against the sky).
A tip here before starting to actually use the tutorial: Since you can't let go of the
materials until the body is done, print out the pages describing the seven first steps
and have the printouts in front of you by the vise. (Step 7 takes you back to the starting
position and from there you can go back to step 1 to continue the weave.)
|
(Full-size pictures on click.)
Step 1
|
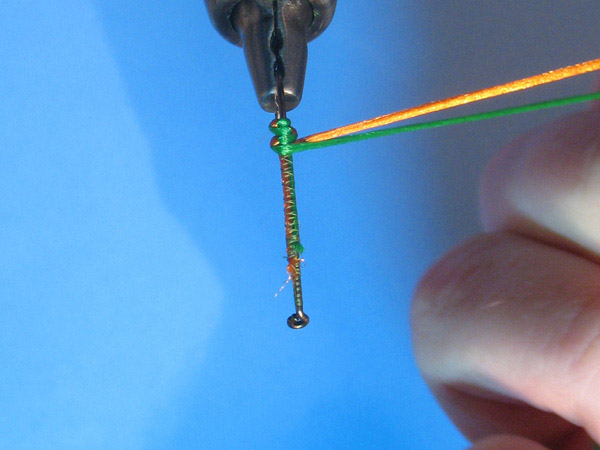
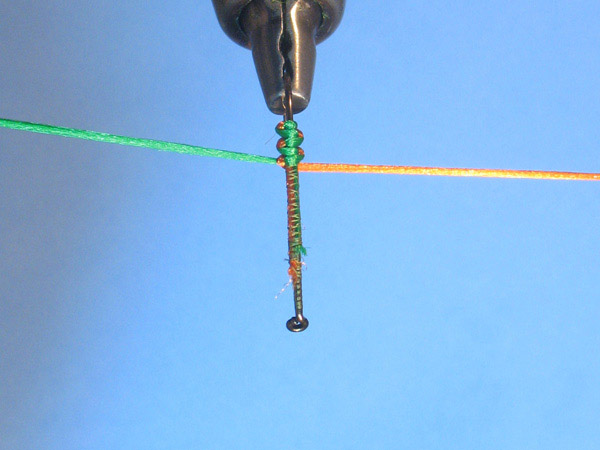
Starting point: The color for the back (here green) tied in on the right side, the
color for the bottom (here orange) tied in on the left side, the tying thread tied
off and finally the vise positioned so the hook eye points towards you.
(Pictures show a top view when sitting at the vise.) Now wipe your hands and
take the materials with a firm grip in each hand. You won't let go of them until
the weaving is done and a constant and balanced tension on the both strands
is essential, so you don't want to feel them start slipping through your fingers... |
Step 2

|
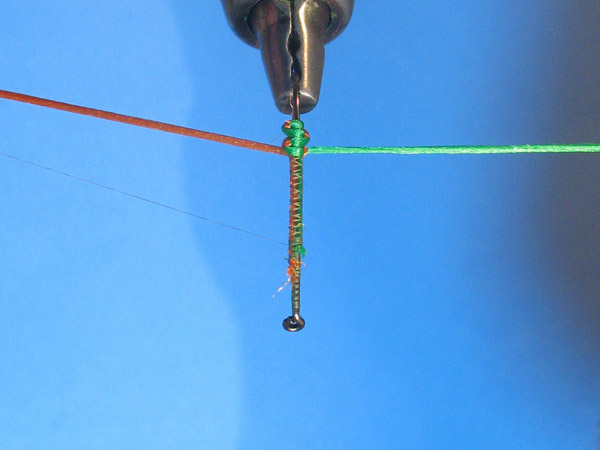
Lay the green strand over the hook to the left side, in front of the orange strand. |
Step 3

|
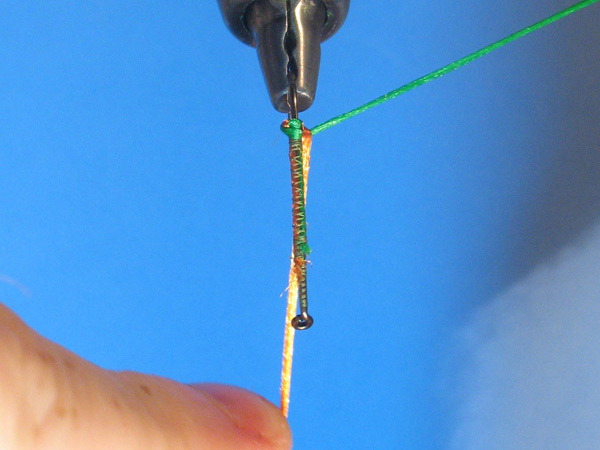
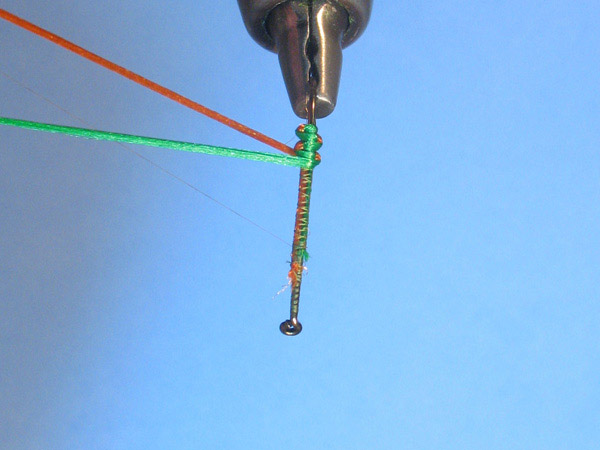
With the left hand, lay the orange strand over the green strand and stretch it
towards you. To avoid pulling the green material (that's already on the hook)
forward, angle the green strand slightly backwards and compensate with some
tension also on that one. |
Step 4
|
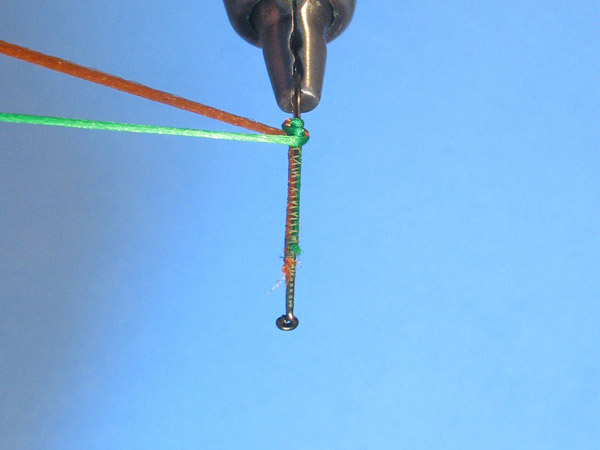
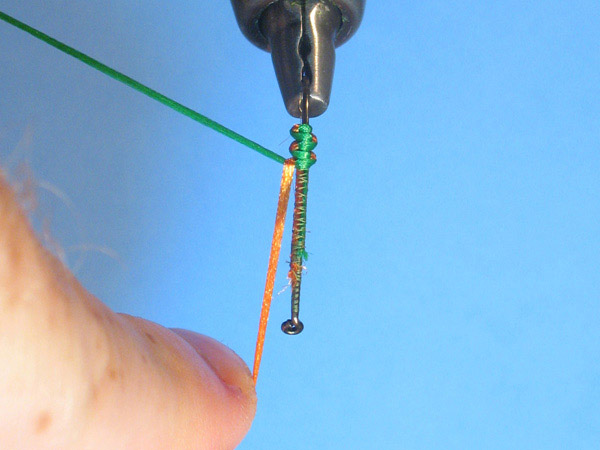
Continue in under the hook with your left hand and the orange material and then
stretch it out to the right. Now you will sit with your arms crossed and have the
left on top of your right. Not a comfortable position, but we will straighten it out. |
Step 5
|
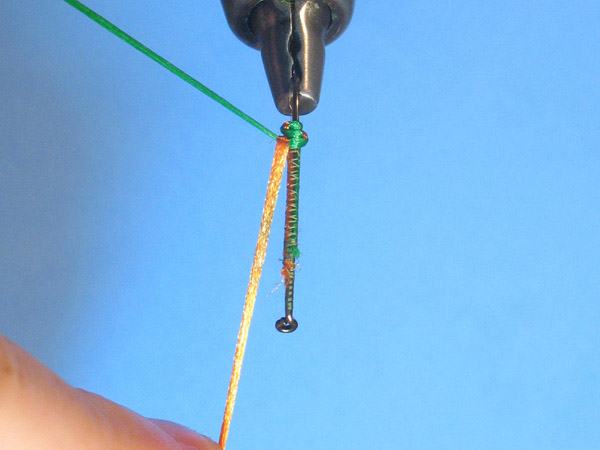
While keeping the orange strand stretched to the right, lift your left arm a bit
to give room for your right hand to come back over the hook. Lay the green
strand over the hook in front of the orange strand. Now we will sit with the
left hand above/behind your right hand and we're ready to untangle our arms. |
Step 6
|
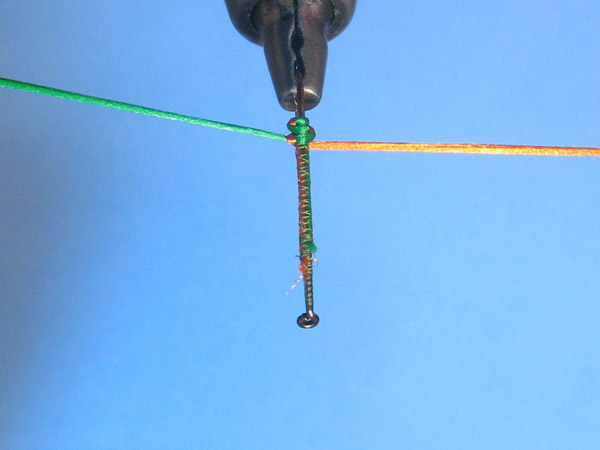
Pull the left hand towards you and the orange strand will automatically come back
on top of the green strand. Just like on picture 3, keep the green material
on the hook in place by compensating with tension backwards on the green strand
with your right hand. |
Step 7

|
From the position on picture 6, the road is clear for the left hand to return to the left side by
continue with the orange strand under the hook. Arms untangled and back in the position where we started. |
Step 8
|
Let's continue. Over with the green/right... |
Step 9
|
"Catch" it with the orange strand, while compensating backwards with the green... |
Step 10
|
Continue down under the hook with the orange (and tangle up your arms again)... |
Step 11
|
Back over the hook with the green/your right... |
Step 12

|
Catch the green with the orange... |
Step 13
|
Back under with the orange and call the wife to come and wipe the sweat from
your forehead... as you can't let go of the materials and do it yourself. |
Step 14
|
Starting to catch the drift? |
Step 15
|
After a little while the moves are "just there". |
Step 16
|
This will be the last one. It's just the same anyway. 'Over/catch/under' and 'back/catch/back'. But... |
Step 17
|
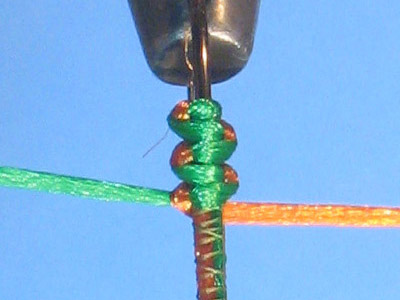
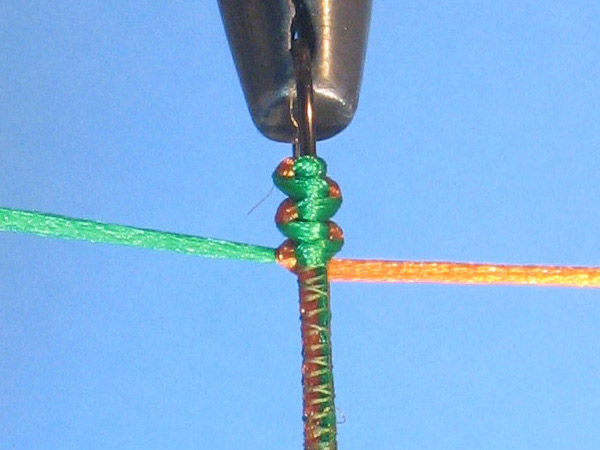
... let's take a closer look at this last one anyway. It shows what happens when the tension
isn't the same on both strands. When doing this I've been sitting in a very weird position to
be able to do the shots. Leaning to the side with the hook 4 feet from me and having the hook
rotated 90 degrees has made my left arm wanting to fall down. This has caused harder tension on
the orange strand. The result: On the hook's right side, the "catch-in" points have been
pulled down, while on the left side they instead lie very high. Gravity sucks. Sit comfortably
and you
will FEEL when it's done evenly. |
Top view
|
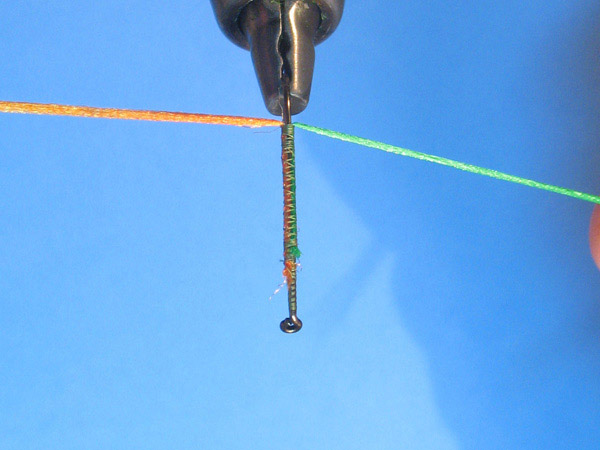
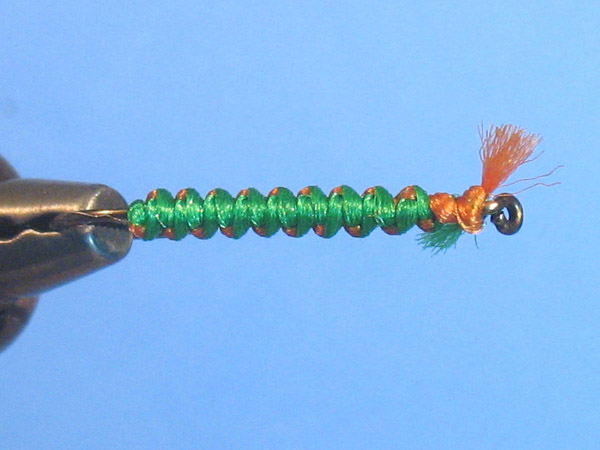
Here I have made one sitting comfortably, with the hook close to me and my arms balanced. It made some
difference. This also shows how you can use this infamous "tension difference senitivity"
to your advantage. On this one I have been slightly harder on the orange through the entire body...
intentionally. This has pulled down the green (only this time on both sides) and made it go a
"detour" (up-across-down) on its way over the hook, which gives the body a rounded back. |
Bottom view
|
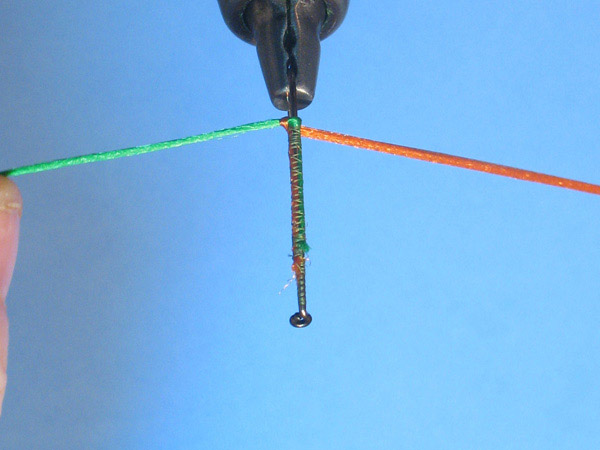
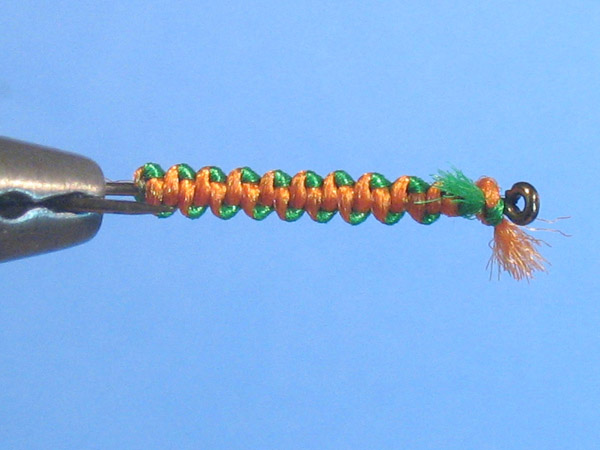
The orange strand on the other hand has more of a plain zig-zag pattern, that just
locks the green without going far up the sides itself... giving it a flatter ventral side. |
Side view
|
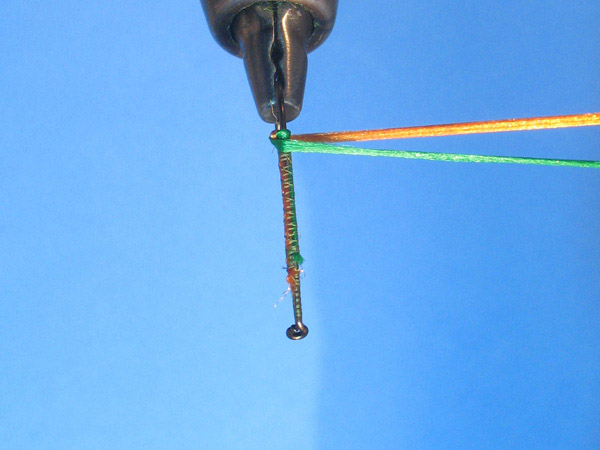
From the side the difference between the two is very obvious. The green strand goes all
the way down before turning, while the orange strand turns around almost immediately. |
|
The thing that can be tricky with this technique is to finish the body. It's truly one of those moments when you wish you got three hands. The thread has to be tied in again, but you can't let go of the materials. But there are a couple of tricks for that too.
*1 (a trick from an Oliver Edwards video): Holding the both materials in your left hand and the bobbin in your right, grab the thread end with your mouth and hold it in place while you tie it in.
*2 (my own favourite): Holding the two materials with your left hand, just catch the thread end with a couple of free fingers on the same hand as the strands and hold it in place while tying it in with your right.
|
|