


|
A step at a time:
FOAM ANT
PDF print version

| Hook: |
Dry fly, #14-18 |
|
Thread: |
Gudebrod 8/0, black |
|
Body: |
2mm fly-tying foam, black |
|
Indicator: |
Poly yarn,
orange |
|
Hackle: |
Rooster, black |
(Full-size pictures on click.)
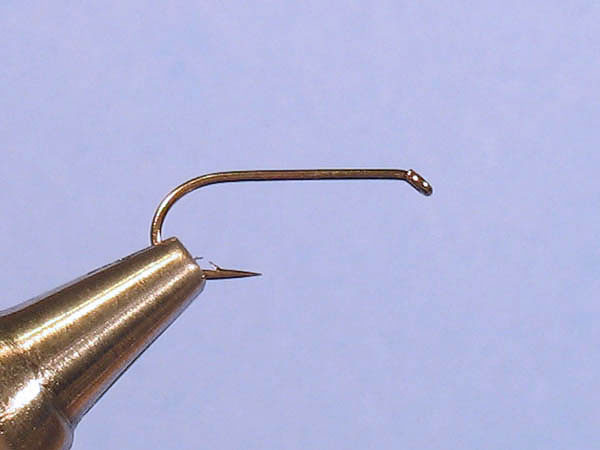
Step 1
|
Mount a hook
in the vise. |
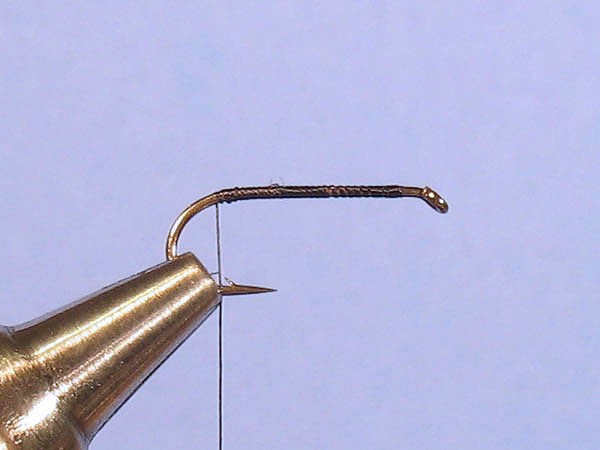
Step 2
|
Tie in the thread and
wrap it back to the hook bend. |
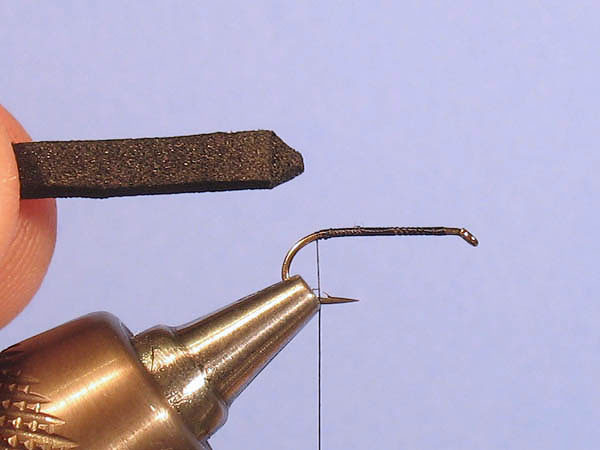
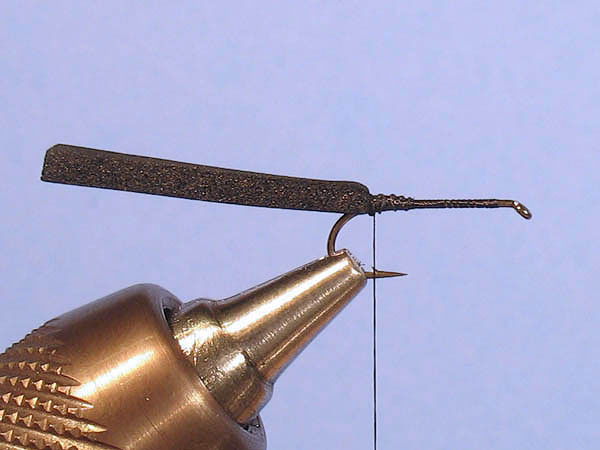
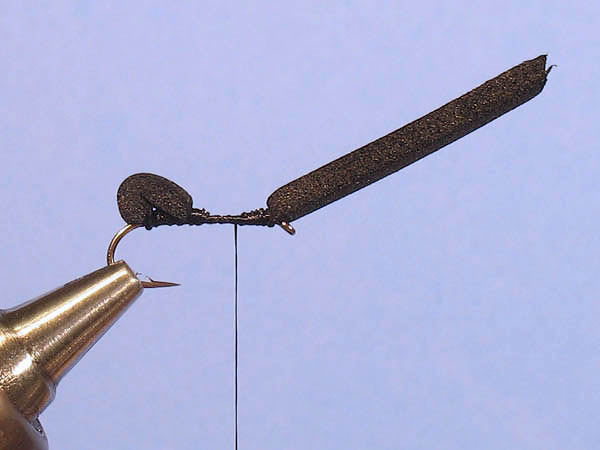
Step 3
|
Cut a strip of foam,
about 4mm wide. Cut the corners to make it easier to tie in.
Also cut a little bit diagonally from the top (clearer on
the next picture) |
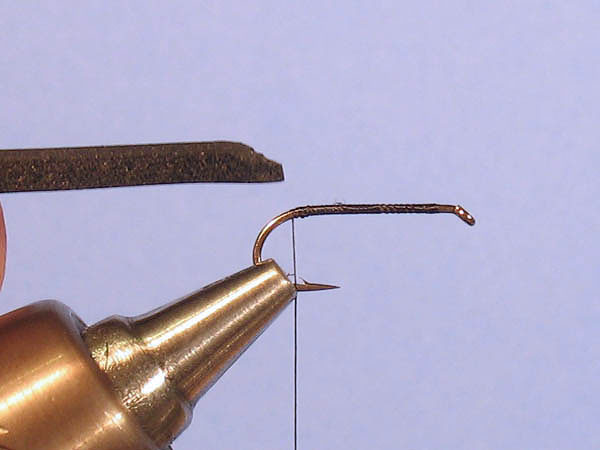
Step 4
|
From the
side. Note that it hasn't been cut to a sharp point. |
Step 5
|
Tie in the foam on the
hook and cover the trimmed part with thread. |
Step 6
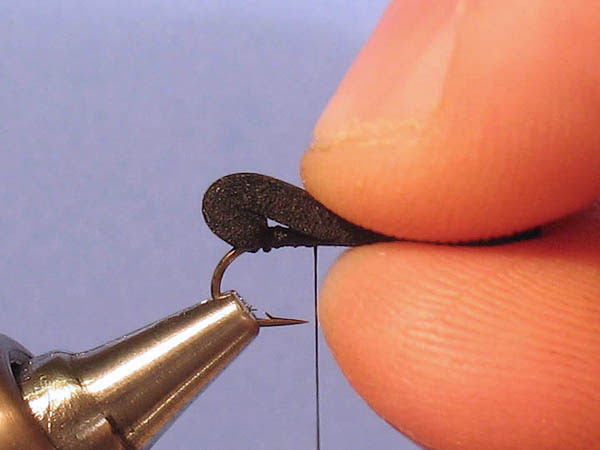
|
Fold the strip over
itself so that a little bit still points backwards and lay
it down on the hook shank. Do not stretch or squeeze it. |
Step 7
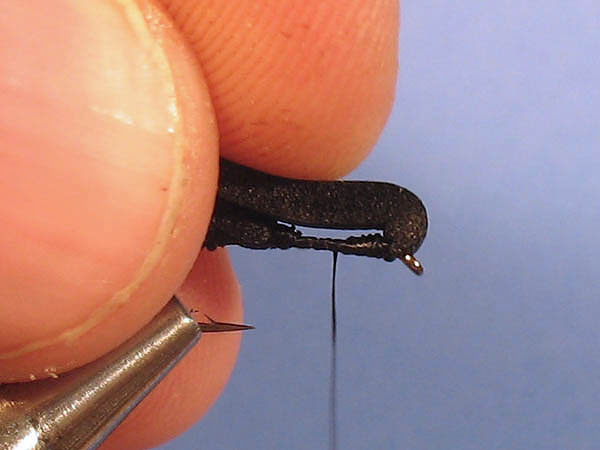
|
Tie it down with a couple
of firm thread wraps. The foam collapses and you might have
to be a little bit violent to be able to cut it close to the
thread. Pull it forward/upwards, stretching it out and force
the scissors in under it. Cut and cover the remaining waste
with thread. |
Step 8
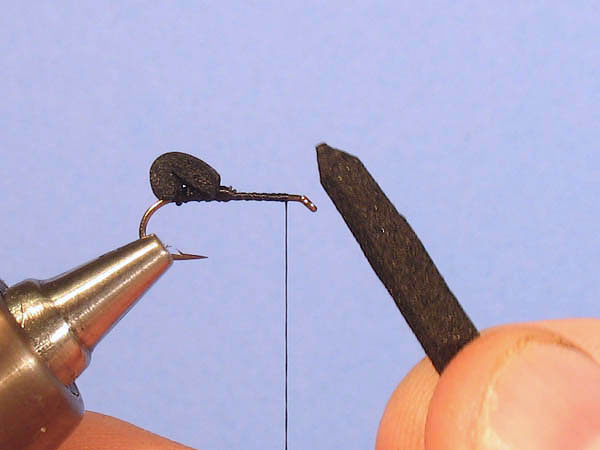
|
Cut another
foam strip, same width as last one or slightly narrower and
prepare the end in the same way. |
Step 9
|
Tie it in the
same way as the last one, but this time with the strip
pointing in the other direction. The whip-finish will not be
made by the hook eye this time, but still save a couple of
millimetres to the hook eye. |
Step 10
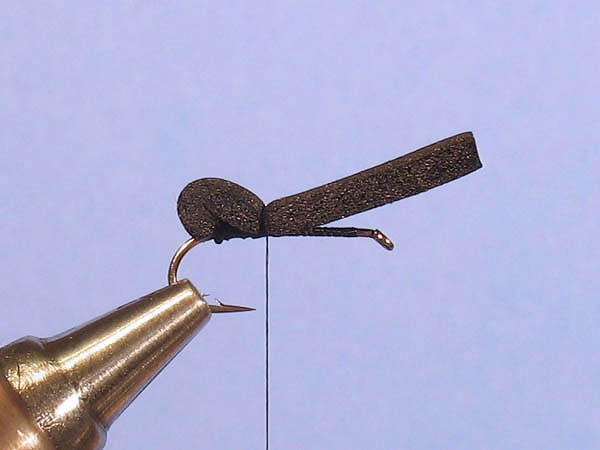
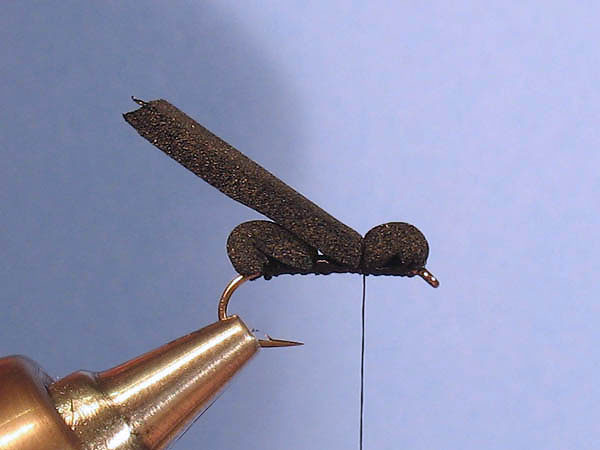
|
Another "the same way". Fold
the foam a little over itself so a little bit still point
toward the hook eye. This is why we still saved some space
inbetween... to be able to easily find the hook eye when
standing by the water. |
Step 11
|
Tie it down to the same size
as the rear one (or slightly smaller) |
Step 12
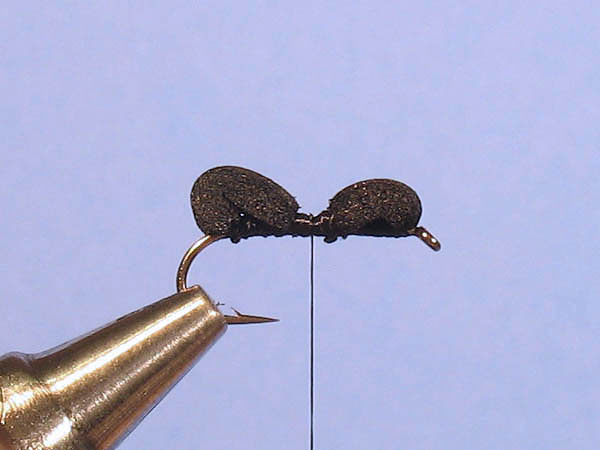
|
Cut the waste and cover the
remains with thread. Now we have created a nice waist
between the two body parts. Already now, without hackle, it
will have an exceptional boyancy and make a nice silhouette
to the fish. |
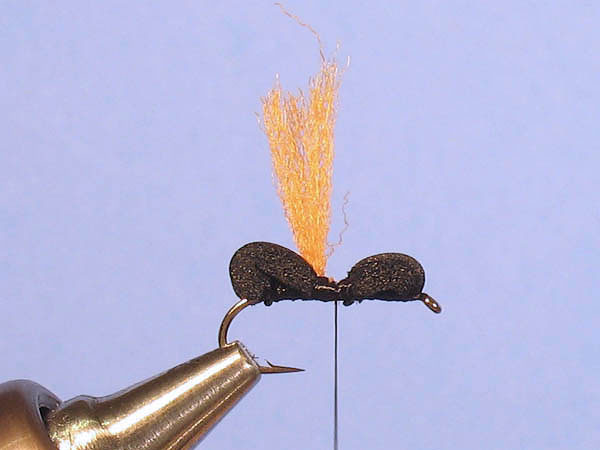
Step 13
|
It's more doubtful that the
fisherman will see it though, so we will use a piece of
brightly colored yarn as help (poly, antron or similar). Tie
it in immediately against the abdomen, so it will stand up
with support from the foam. |
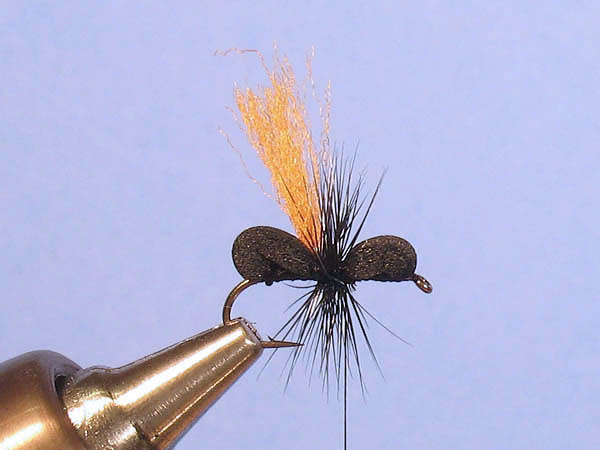
Step 14

|
Tie in a
hackle feather in front of the yarn. |
Step 15
|
Wrap the hackle 3-4 turns
around the waist and, instead of doing it in touching turns
like on a standard collar hackle, do it the kind of
"criss-cross" way. It will spread them out some. Tie it down
behind the foam and cut the waste. Make a whip-finish at the
same place, trim the yarn to desired height and cement the
exposed thread under the fly. You can of course cover the
shank with dubbing while tying this fly, but it won't make a
difference to the silhouette. Better is to get the thread
and the critical points cemented. |
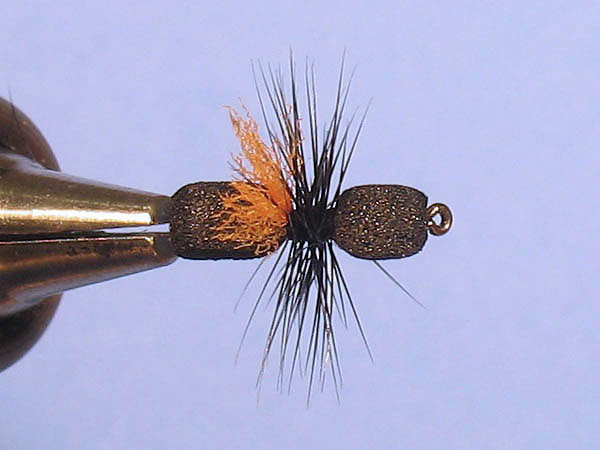
Done...

|
Very easy and quick tie.
Extremely boyant and very durable. A lot of qualities
defining a good dry fly. |
Top view...
|