
|
A step at a time:
BI-COLOR PTN
PDF print version
Originator: Alan Bithell
| Hook: |
Wet fly, #12-20 |
|
Thread: |
8/0, yellow |
|
Back/tail/wingcase: |
Natural pheasant
tail |
|
Body: |
Dyed pheasant tail |
|
Rib: |
Copper wire |
(Full-size pictures on click.)
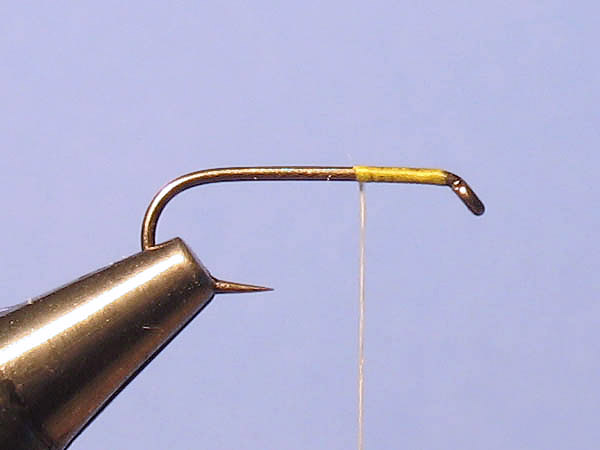
Step 1
|
Mount a hook in the vise,
tie in the thread and cover the thorax area with thread. |
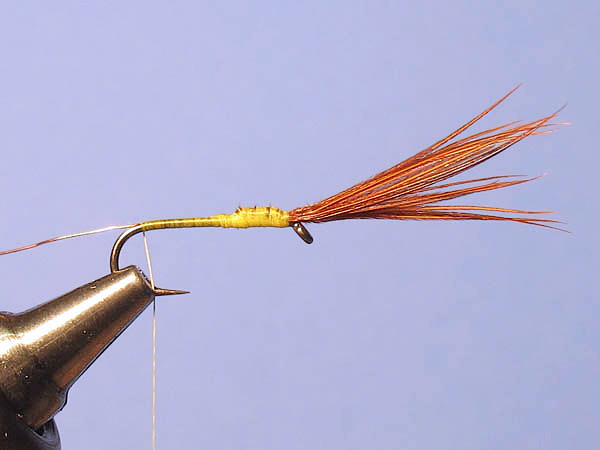
Step 2
|
Measure a
bunch of pheasant tail barbs. The front part, with the tips,
should be about 1,3 - 1,5 x the total body length of the
fly. |
Step 3
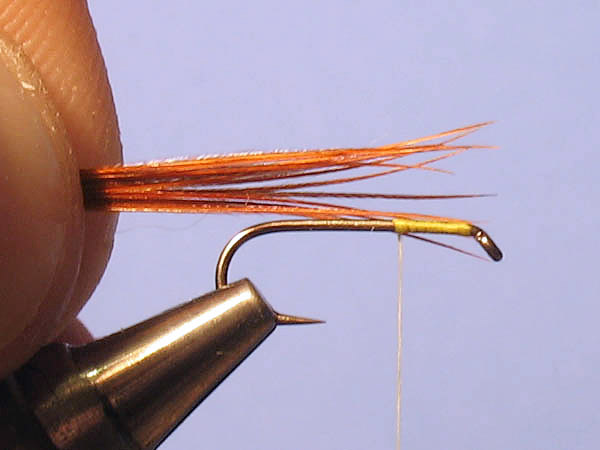
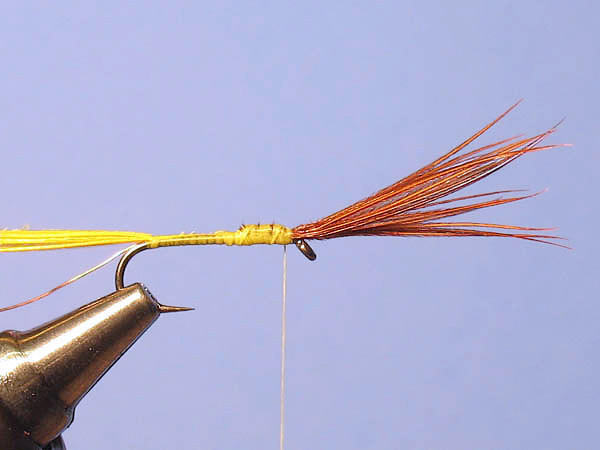
|
Tie in the
bunch so the tip part point out forward past the hook eye. |
Step 4
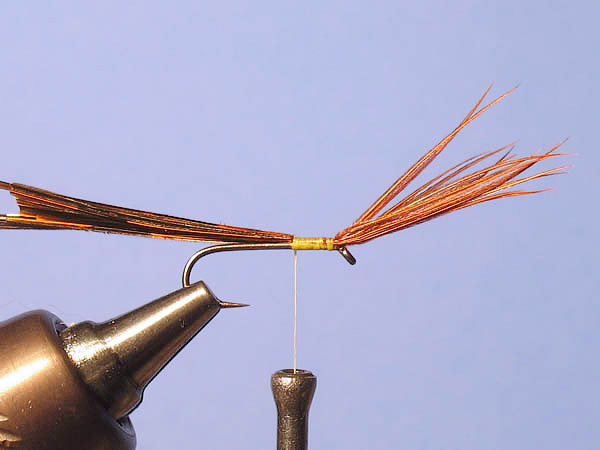
|
Fold the
rear part of the bunch up over the thorax area and secure it
there. We're using this surplus part to build up a little
larger thorax. This way we get the bulk above the hook shank
and keep a maximum hook gape. This makes this technique very
suitable for hooks also in the smaller size ranges. |
Step 5
|
Cut the
waste of the surplus end as close to the thread as possible. |
Step 6
|
Cover the
rest of the hook shank with thread and tie at the same time
in a piece of copper wire or ordinary round tinsel. |
Step 7
|
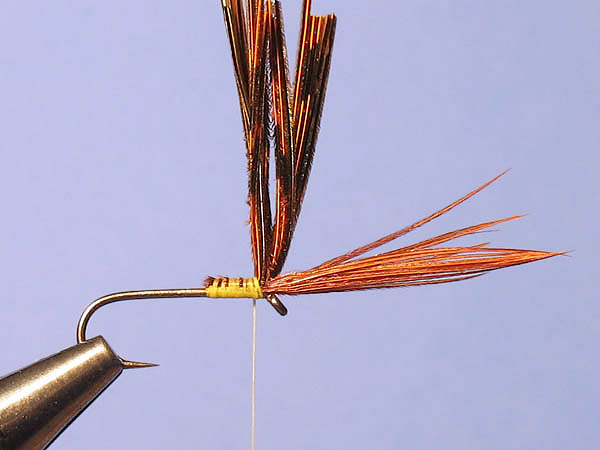
Tie in a
bunch of lighter colored material, here yellow pheasant tail
barbs. This fly should be seen more as an idea than a
pattern, since it's open for a lot of variants while still
keep the advantages of the actual bi-color technique. Note:
If weight is to be added, now is the time to do it. |
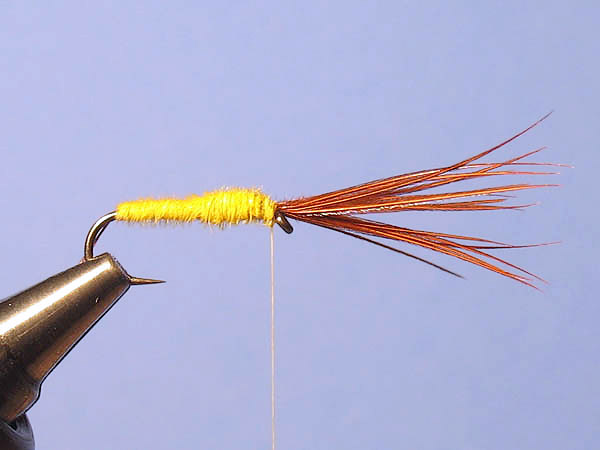
Step 8
|
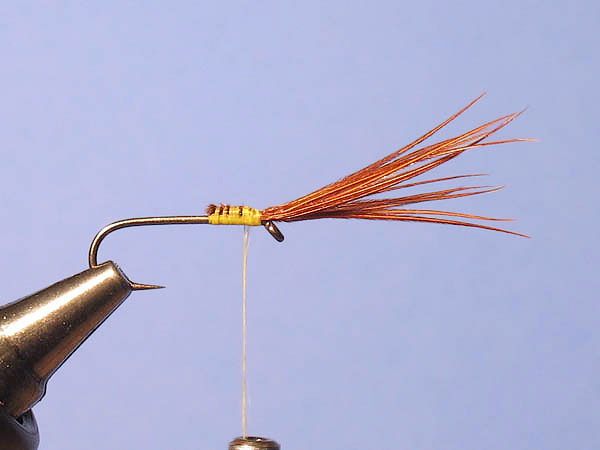
Here the
yellow pheasant barbs have been wrapped up towards the eye
and been secured at the head of the fly. |
Step 9
|
We are
done with the thread work and a whip-finish is made in a
regular manner. |
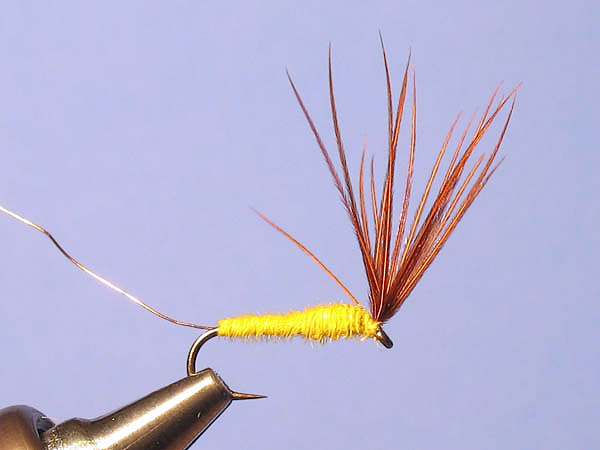
Step 10
|
Now it's
time to get imitative. |
Step 11
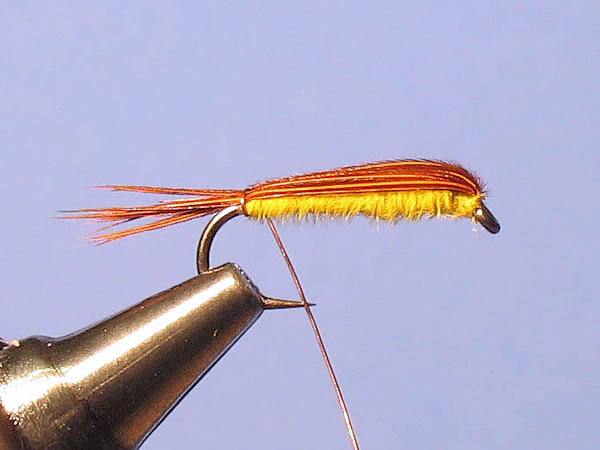
|
The darker
barbs are folded back over the hook shank and tied down with
a wrap of tinsel/wire at the end of the body. A darker back,
a wingcase and a tail are created in one swift move. |
Step 12
|
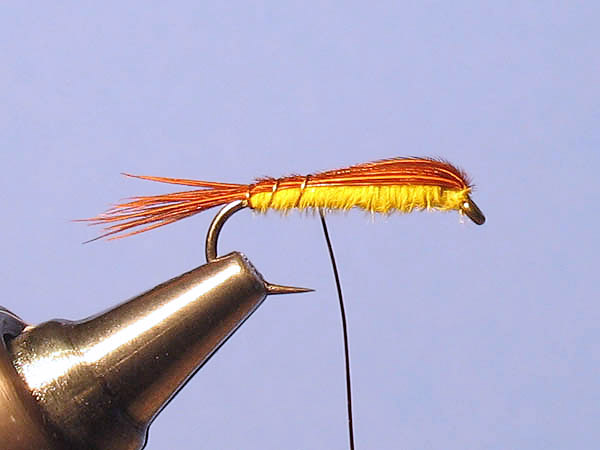
Continue
to rib the wire forward and tie down the back barbs in
segments. |
Step 13

|
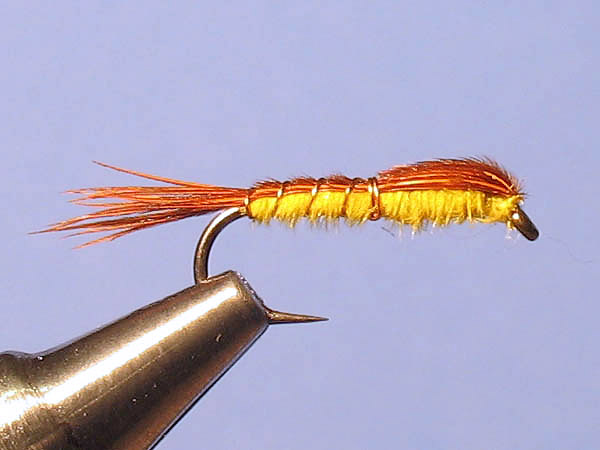
At the
start of the thorax, finish off the wire with a couple of
half-hitches and cut the waste. |
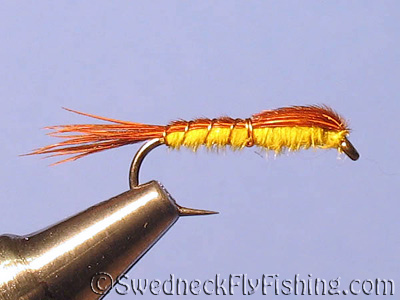
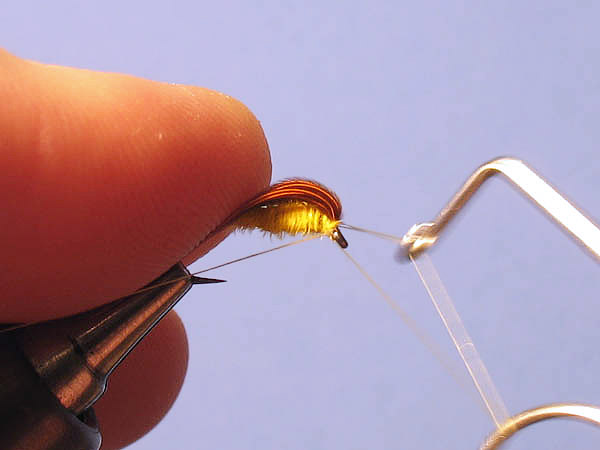
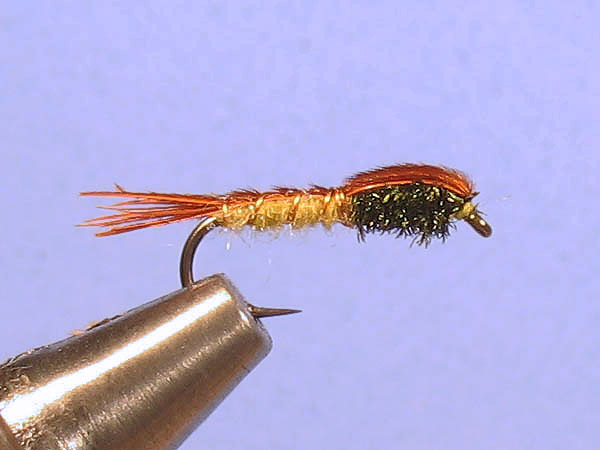
Done...
|
And here
it's done. Quick, simple and imitative with few materials.
Strong factors defining a "perfect" fly. |
Variants

|
Smaller
hook with olive body. |
|
Another
variant, with yellow SLF dubbing for abdomen and peacock
herl for a thorax, but still based on the very same idea. |
|