


|
A step at a time:
OVERHAND WEAVE / CROCHETING
PDF print version
Overhand weave, crochet weave, knit-picking weave... "the child you love has 1000 names".
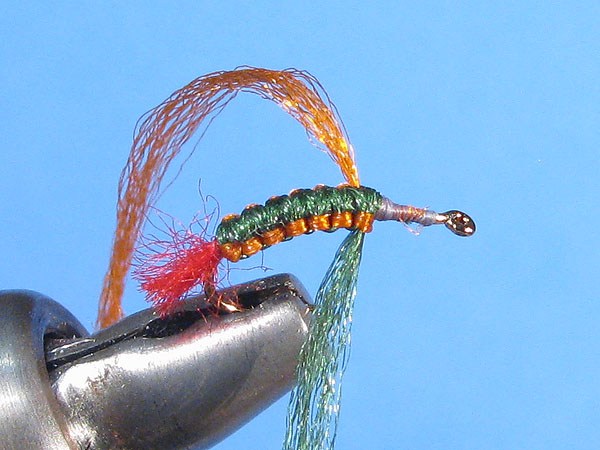
This one gives a neat looking body. A dark dorsal side and a light ventral side separated
by two thinner lines of the colors inverted along the sides. Unlike the parallel weave that
gives a somewhat similar result, this is a technique based on "knotting" the body. In other
words: While the parallel weave requires commitment throughout the weaving, this one will
allow you to let go of the strands and take a coffee break in the middle of tying.
|
(Full-size pictures on click.)
Step 1

|
Before we start: This wasn't intended to be a separate SBS and I therefore didn't prepare
for it to be. It was just a small part of another SBS that suddenly started to grow while
doing it. So, ignore the angle of my vise. Turn your vise so you get the hook eye
towards you and can look down on the back of the hook. The green side here will still be
described as 'right' and the orange as 'left', the way it's supposed to look like.
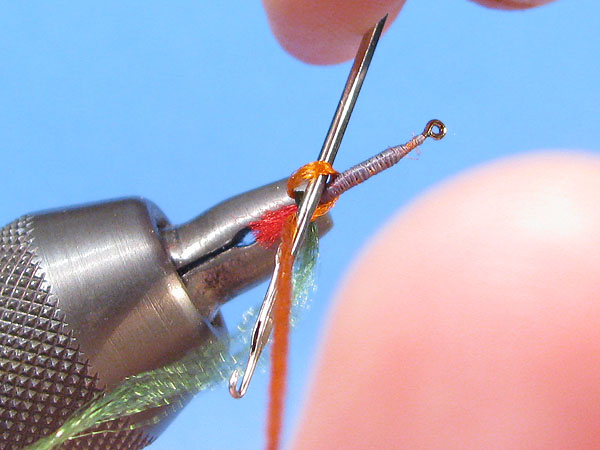
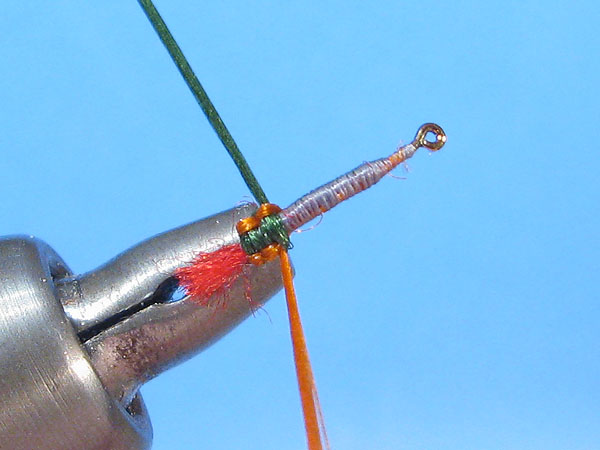
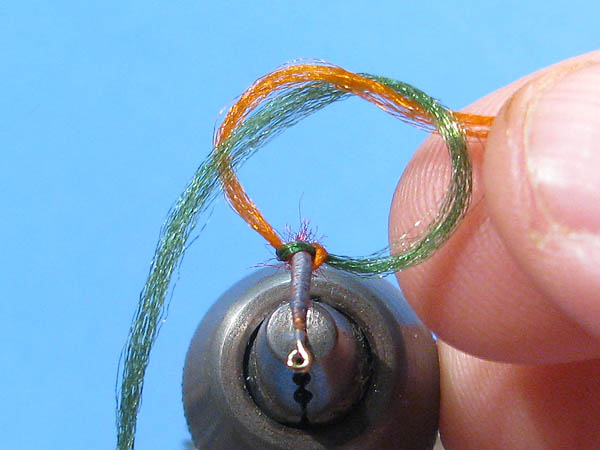
Starting point: The color for the back (here green) tied in on the right side and the
color for the bottom (here orange) tied in on the left side.
Tying off the thread before starting when using a knotting tool is optional. Both ways work just fine if you ask me. |
Step 2
|
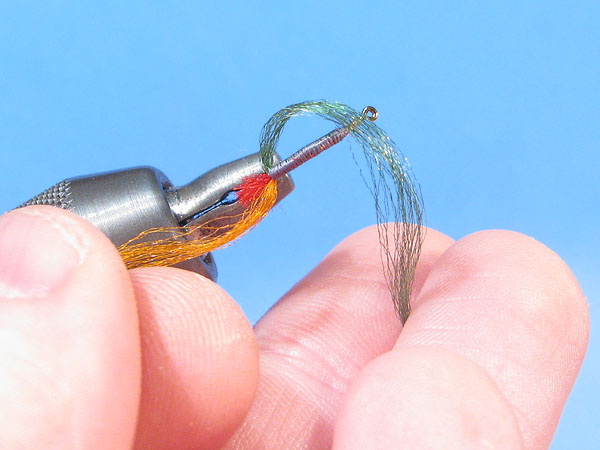
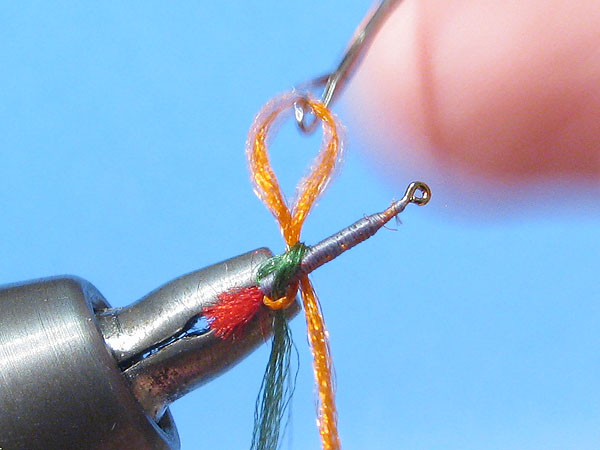
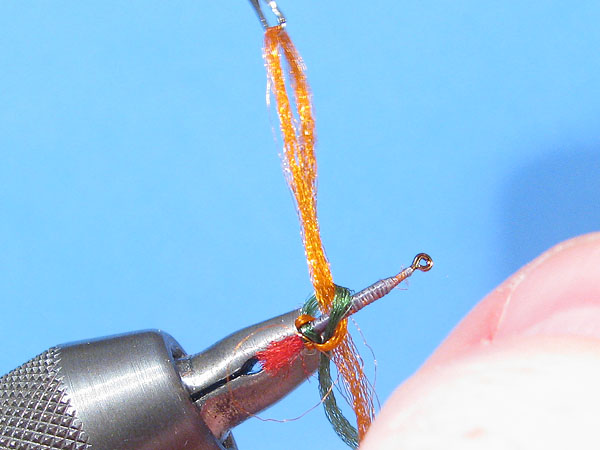
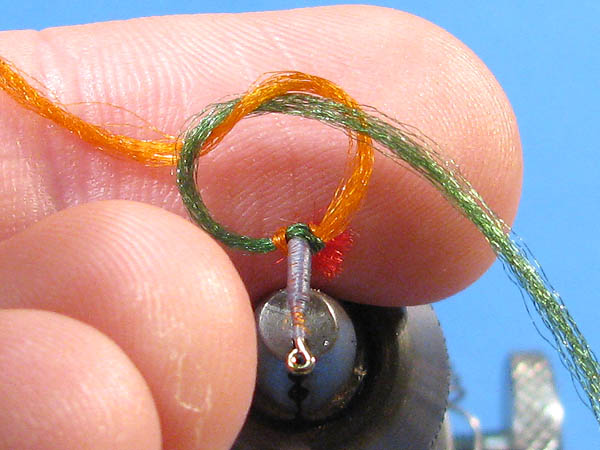
Bring the darker strand on top of the hook, forming a loop on the right side. |
Step 3
|
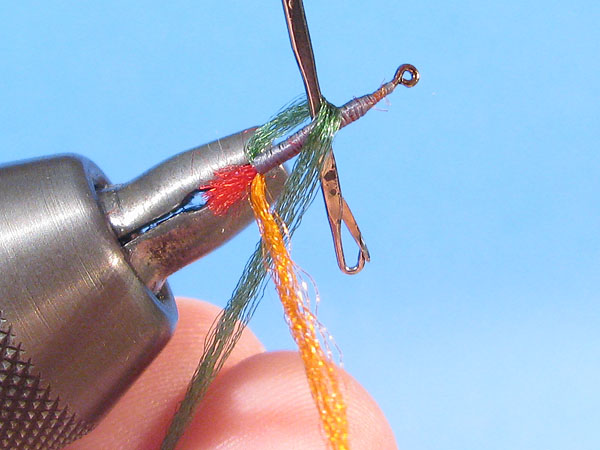
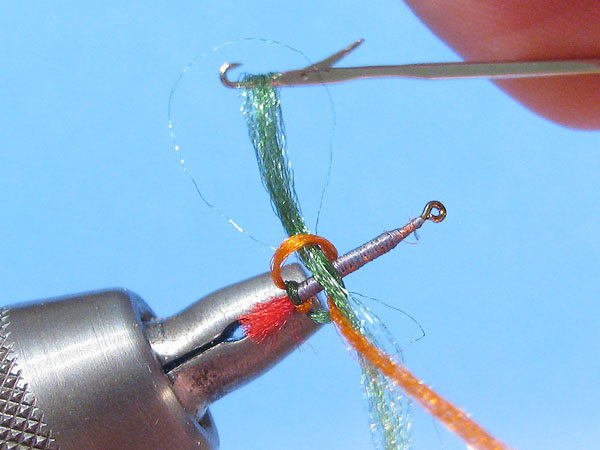
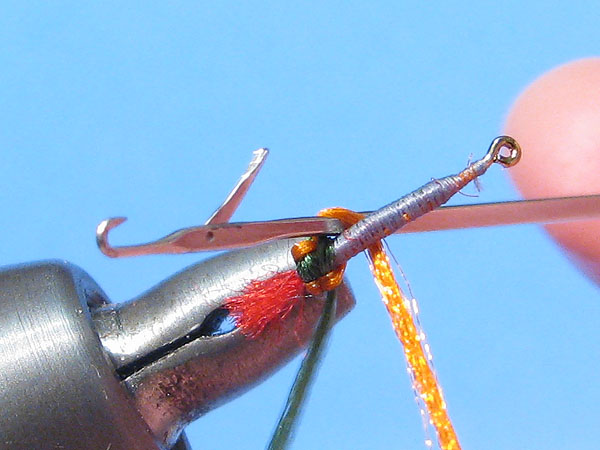
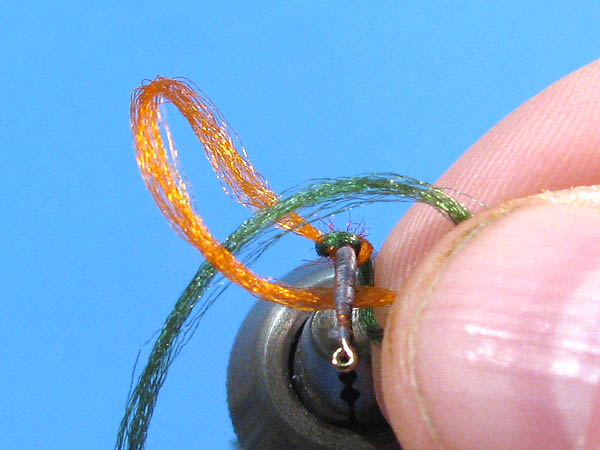
Slide your tool down through the loop and under the hook. |
Step 4
|
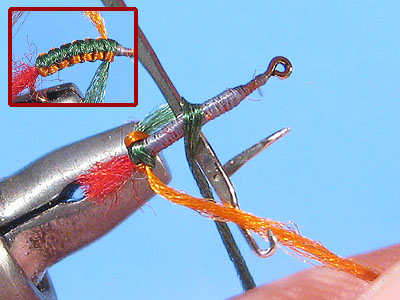
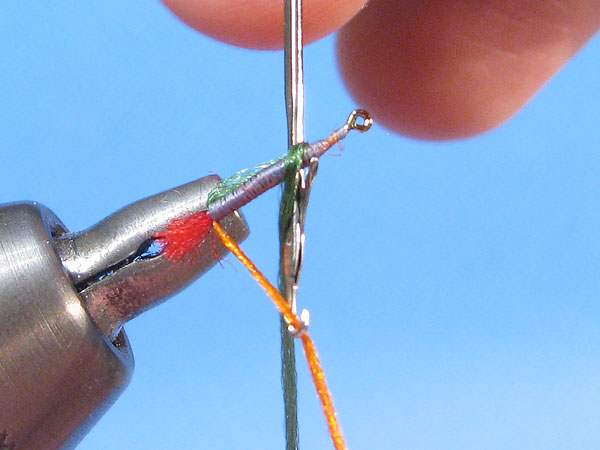
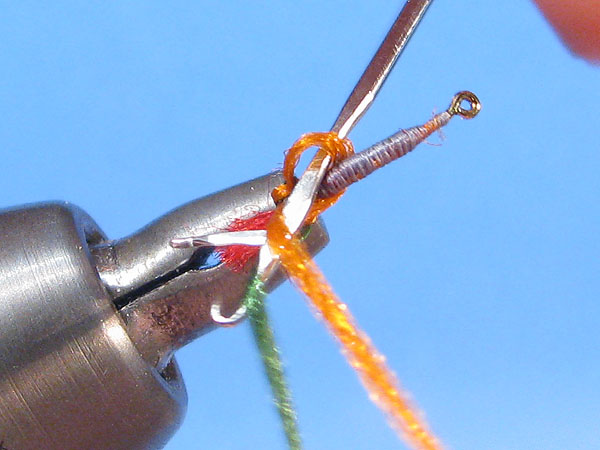
Catch the orange strand with the tool on the other side of the hook. |
Step 5
|
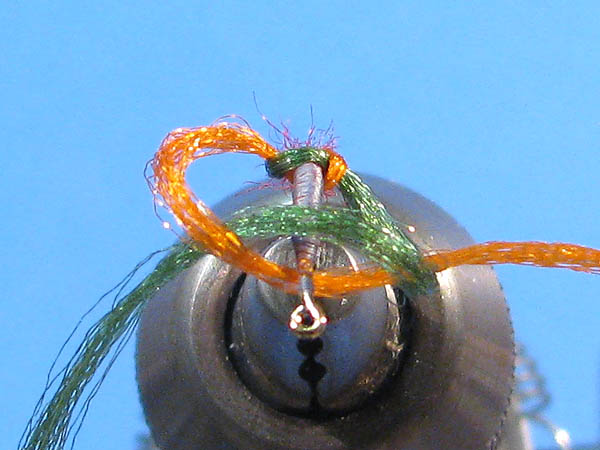
Pull it over the green strand, in under the hook and up through the loop on the right side. |
Step 6
|
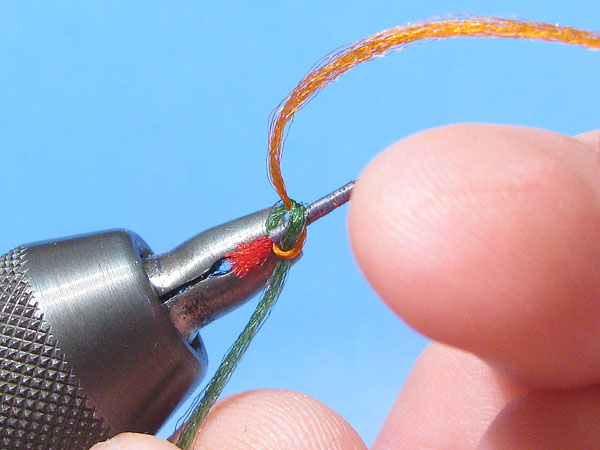
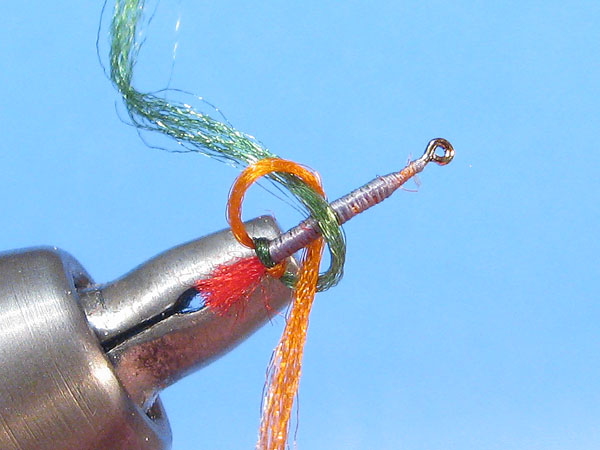
Pull it all the way and release it from the tool. |
Step 7
|
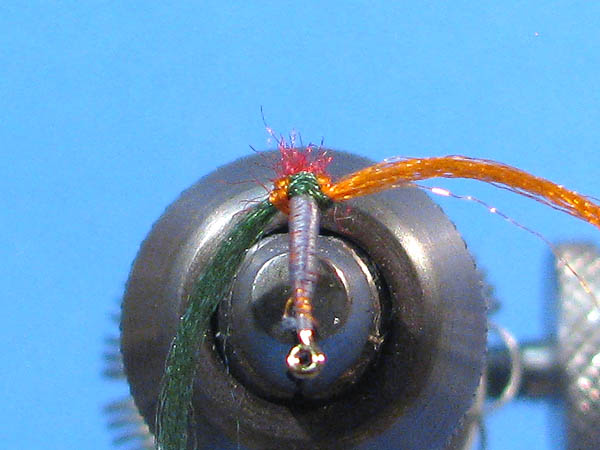
Tighten by pulling both strands straight out to the sides. Here we have a simple overhand knot,
with the green strand on top of the shank and the orange strand under it, locking eachother to
the sides opposite from where they started. |
Step 8
|
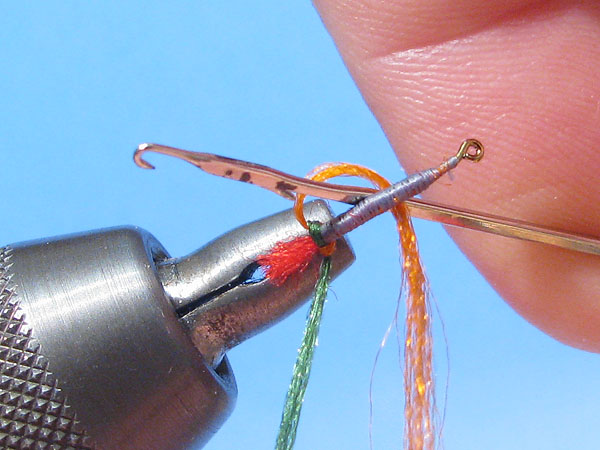
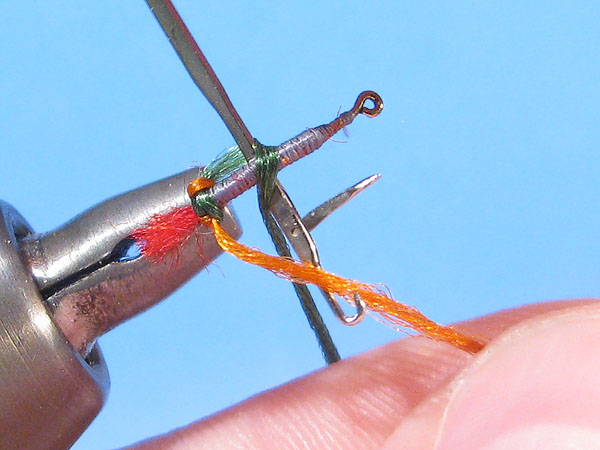
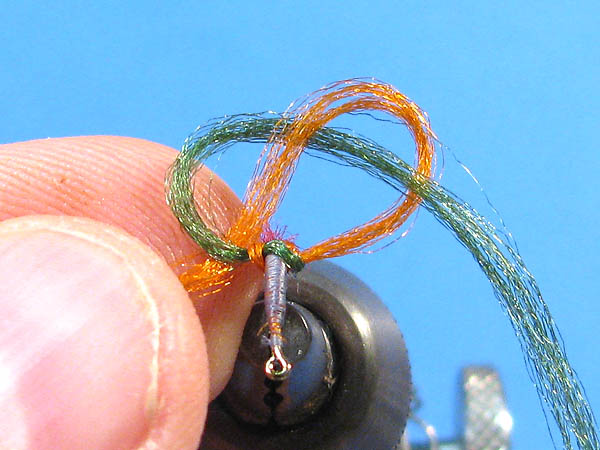
Next knot will be basically the same procedure... but opposite. This time you use the orange
strand to form a loop and this time by laying it under the hook. Then slide the tool up
through it and over the hook. |
Step 9
|
Catch the green strand on the left side with the tool under the orange strand. |
Step 10
|
Pull it under the orange, over the hook and down
through the loop on the right side. |
Step 11
|
The same knot... but opposite. |
Step 12

|
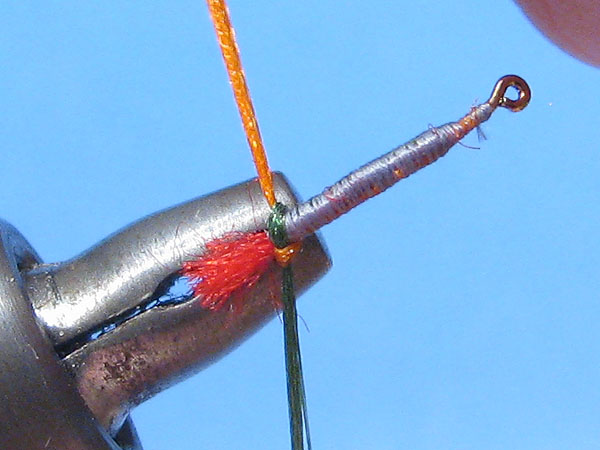
Finish by tighten and the strands are back on the sides where they started. |
Step 13
|
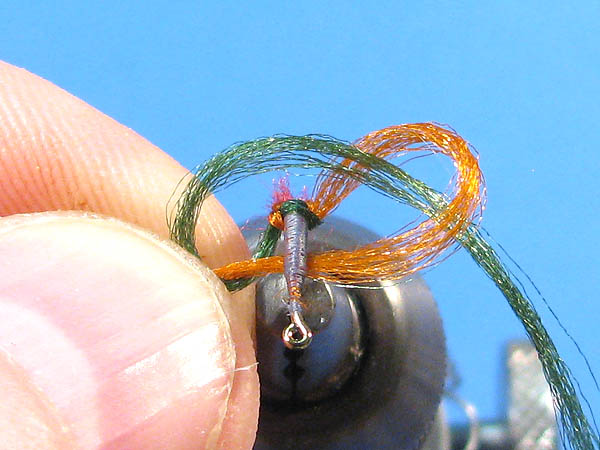
Another one: Down through the green, under the hook and catch the orange over the green. |
Step 14
|
Pull it up through the green... |
Step 15

|
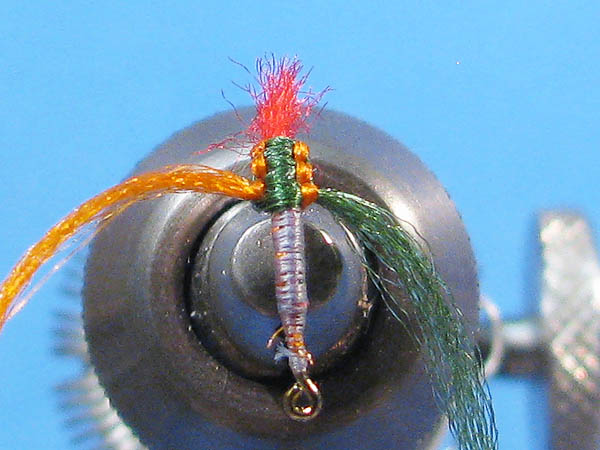
... and tighten. Now we can see on the orange how these locking loops on the sides will
"cuddle up" beside eachother, forming the inverted stripes along the sides of the body. |
Step 16
|
Many use crocheting needles or other open hooks for this, but this is why I like this particular
tool. It allows you to work with very small loops so you can keep tension on the strands at all
times, which prevents disturbing and losening up knots behind the one you're working on. |
Step 17
|
Instead of catching the wrong strand in "close quarters" the tight loop will close up the tool, which will
both keep the right strand on the inside and make the wrong strand slide right off on the outside. |
Step 18

|
Small loops is the way to do it. |
Step 19
|
This will be the last one. I guess you've catched the drift by now. But before wrapping this SBS up we're going to take a
quick look at another technique to do the same weave, that doesn't require a tool. It does however require tying off the thread first. |
Step 20
|
This time we will prepare the knot before applying it to the hook. Make the knot so that the green strand
will exit the loop (left side) towards you. |
Step 21

|
Push down the orange strand on its exiting side, creating a gap between them by your fingers. |
Step 22
|
Let the orange strand slide in under the hook shank. |
Step 23
|
Fewer fingers in the way and easier to see... |
Step 24
|
And tighten in the same way as usual. |
Step 25
|
Here you don't have to think about "opposite procedures". Starting on right or left, the correct knot should
still always have the top color exiting towards you and the bottom color exiting away from you. |
Step 26
|
It's always the bottom color's exiting side being pushed down... |
Step 27
|
... and slipped in under the hook. |
Step 28
|
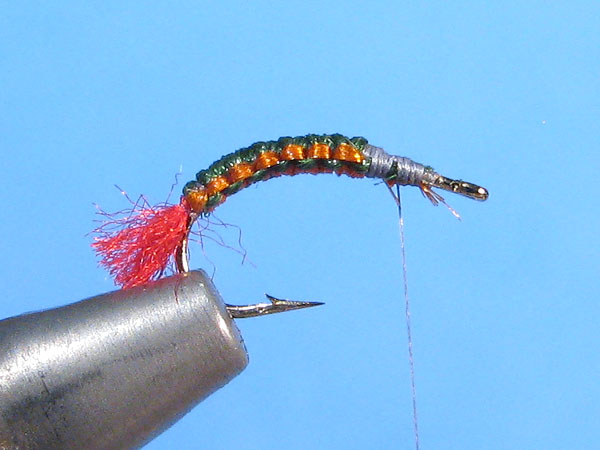
Tighten up and here we have another piece of body, this time without tools and using the knot that's probably the
first knot you learned in your life. |
Further tips:
|
* Using a thinner material (compensating with thicker underbody), will give you better control over
the taper and will allow more knots (giving a prettier fly). The thickness can often be customized by
ripping out filaments from thicker materials and doubling thinner materials. Also "packing" the knots backwards while
doing them gets them tighter and makes a difference to the better.
|
|
* Pulling a little extra in the bottom strand will give
you a more imitative shape, with a flatter ventral side and a little more rounded dorsal side. |
|